Updated in January 2023
Congratulations on choosing to play NieR Replicant ver.1.22474487139! Our unique guide will help you achieve all trophies in the game. This is a remaster / partial remake of the original NieR that was released in 2010, specifically, the Replicant version of the game, which was initially released in Japan.
The story focuses on a younger man saving his sister (as opposed to the Gestalt version, where the main character is a father protecting his daughter). This ver.1.22474487139 has new features to combat “The World of the Recycled Vessel” DLC and some additional content from the original version.
Although mostly similar, the trophy list for this game version does include five new trophies – 2 story-related, 1 for a new ending, 1 for completing the Recycled Vessel, and one miscellaneous. It would be best if you upgraded several weapons as in the original game.
However, the free “4 YoRHa” DLC access to extra weapons makes upgrading from a possible 38 less tedious. So, let’s start our NieR Replicant trophy guide right now!
What you will need to get all trophies in NieR Replicant
To unlock the entire game, you must complete it once and then five more times in partials. Then you can earn all 47 trophies. It should take approximately 45-50+ hours to get the last Platinum trophy if you know how to manipulate the clock for Legendary Gardener; otherwise, it’ll be 168+ hours (depending on luck).
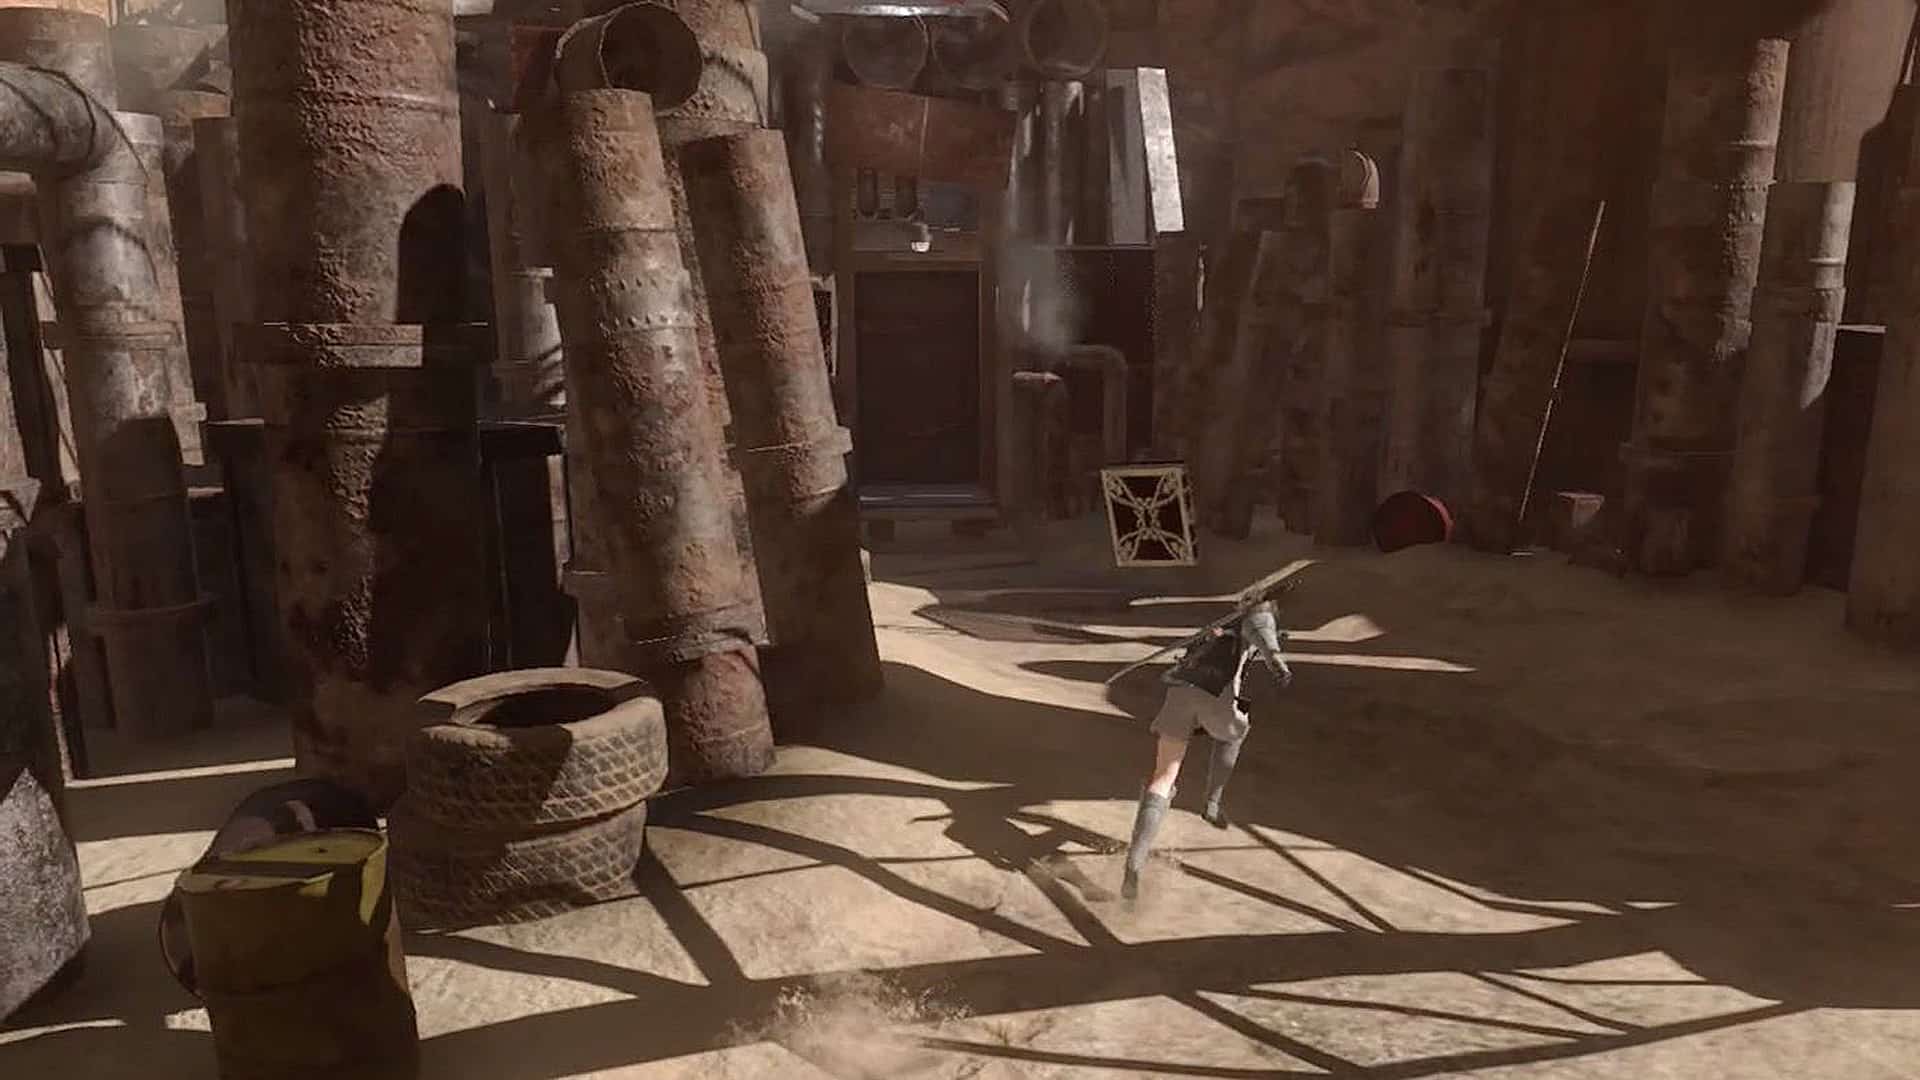
Walkthrough
NieR Replicant is designed so that the story progresses in two parts, Part One and Part Two. If you reach an ending, the game resets to a point after the beginning of Part Two. Technically, 4 “playthroughs” are needed for all finales, but only the first one – from start to Ending A – is considered a complete playthrough.
With each new “playthrough,” you only run less than half of what’s necessary for a whole game, except with Ending E, which requires playing through some content from Part One again before accessing new Ending E content.
You can miss two things in this game: Lightspeed Fighter and The Sheep Whisperer.
This is how the breakdown will look:
- Slot A. Your main save slot throughout the game. Save progress, completed endings, etc., will all override this one.
- Slot B. Create this save just before you finish Part One for the first time. If you’re following the walkthrough, it should take at most 10 hours. You will use this to complete your speed run.
- Slot C. This extra slot is perfect for “boss” fights where time-related trophies are at stake. If you need to retry the battle, you can reload this save and try again.
On the higher levels, you will not receive difficulty trophies for completing NieR Replicant ver.1.22474487139. Thus Easy mode is recommended if you’re going for the Platinum trophy faster.
Hard difficulty – a significant uptick in their HP bar that elongates all battles and makes it very difficult for me to acquire any rare items quickly, regardless of which setting you pick.
The only tangible difference is that there are more enemies slain faster when playing at an average level compared to its more challenging alternative.
Step 1. Play through the game up to the last quest in Part One
Before you begin your speed run, you should know a few things. If you need to idle the game at any point, save and exit back to the main menu first. The clock does not pause when the game is stopped, so leaving it is your only option if you want to stop it.
In your first playthrough of Part One, you can earn the Go-To Guy trophy by doing all side quests, but it’s much better to wait till Part Two. The following side quests should be completed:
- Boar Hunt (Available in the Village).
- The Shopping List & A Return to Shopping quest-line can be picked up in the village. These quests will unlock your garden so you can start planting flowers and crops. If you don’t do these quests, you can purchase a book in Part Two of the game that will unlock your garden – though it’ll be more expensive.
- The Fisherman’s Gambit quests can be picked up in Seafront.
You’ll want to get the Legendary Gardener as soon as possible, whether you plan to do it properly or time-manipulate. There are no weapon side quests in Part One, but there are a few weapons you can only find in crates out in the world. Check out Weapons Collector so that you can catch all of them.
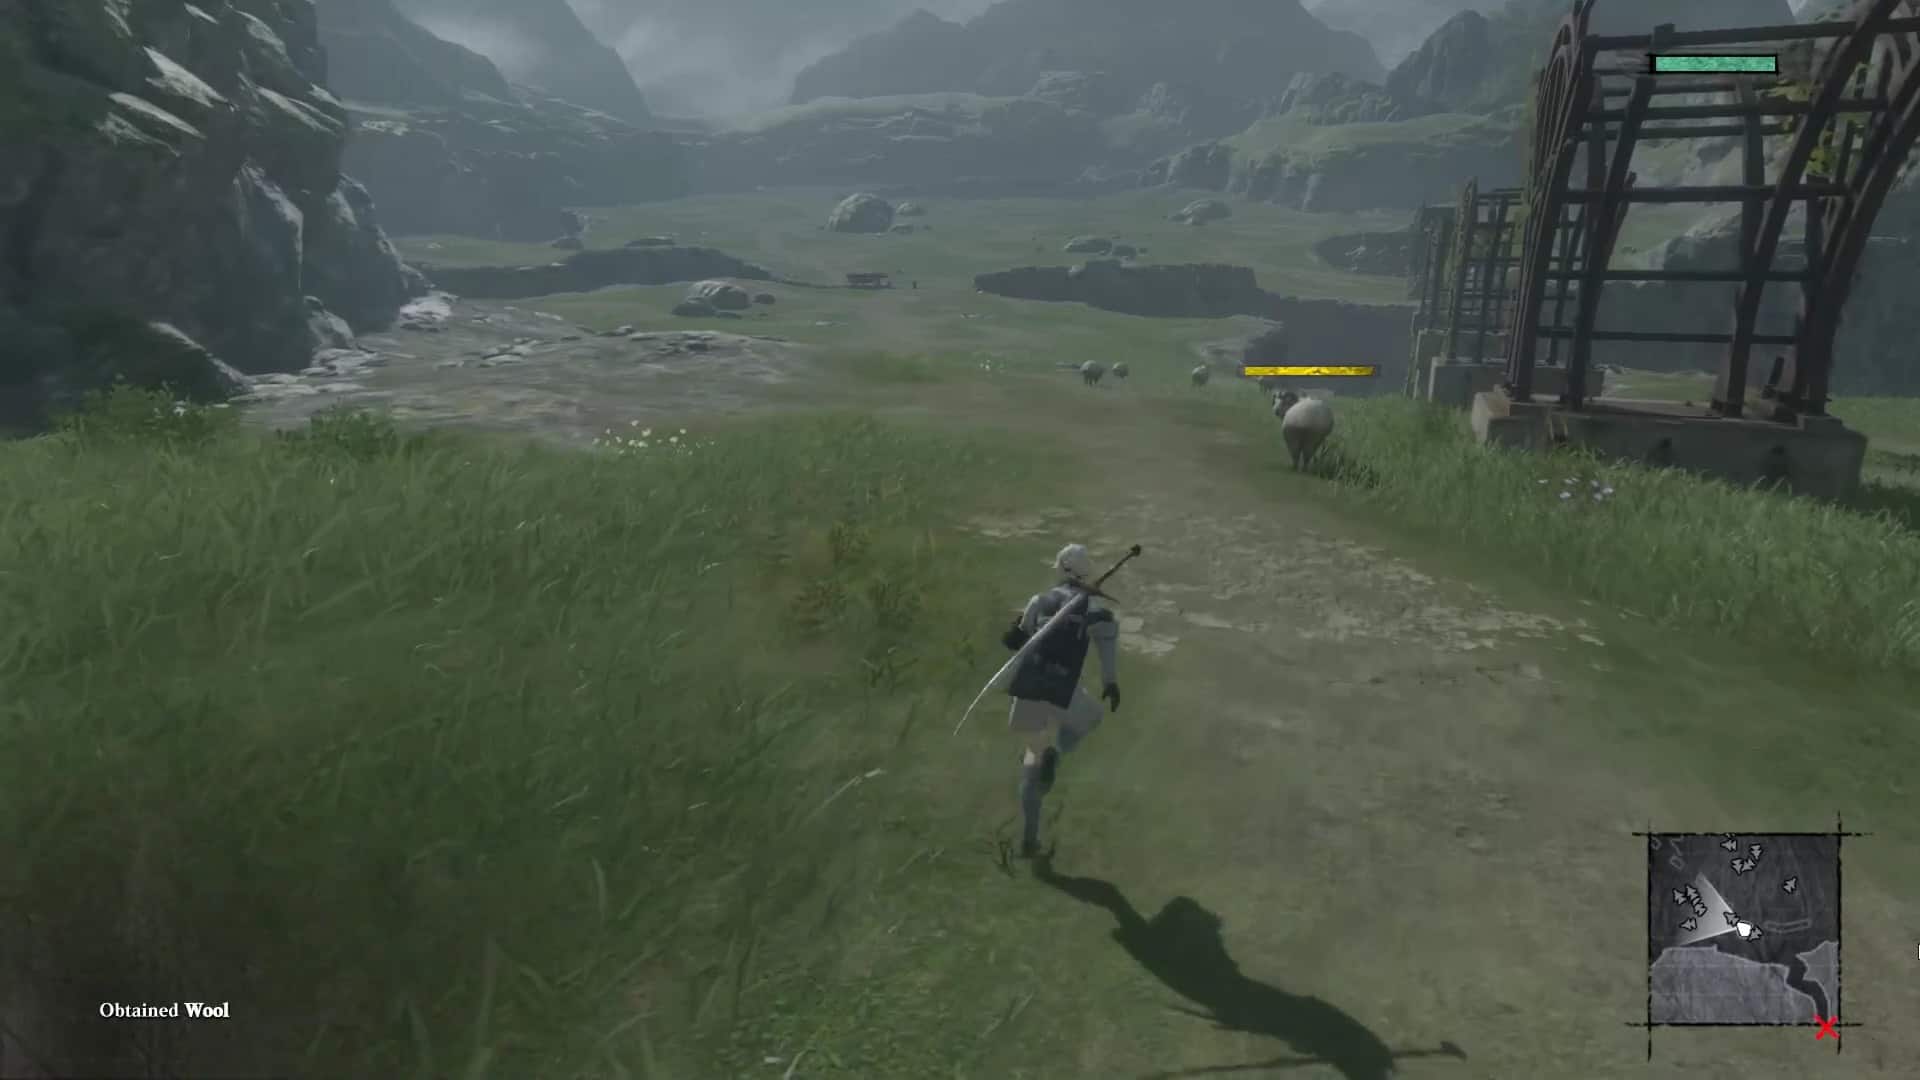
Completing “Boar Hunt” allows you to ride Boars around, making sure you spend at least 5 minutes on one for All Aboared! Gather every shiny material as you come across them; they will be helpful for weapon upgrades. Lastly, slaughter any sheep in the Northern Plains so that by the end of Part One, you have 100 sheep killed.
Your primary focus while playing should be to follow the red “X” on your mini-map and complete all of the quests related to the story. The last search you’ll receive before Part One ends are from Popola, asking you to pick up some Vapor Moss by the Southern Gate.
Once you have this item in your possession, the ending sequence for Part One will automatically begin and prevent you from doing anything else. Therefore, ensure All Aboared and The Sheep Whisperer are completed beforehand, and any other sidequests or weapon upgrades you may want.
If you’re primarily focused on story-related quests, your current gameplay should only be around 10 hours. However, save your game progress in Slot B before collecting Vapor Moss if you want to complete the speed run. You’ll need to reload this after completing Endings A through C.
After you complete this step, you will have earned the following:
- The Book of Legend.
- The Wild Companion.
- The Mellow Companion.
- All Aboared!
- The Sheep Whisperer.
- The Magic Man.
Step 2. Complete the first ending and override Save File A
Save File B is ready for your speed run, so continue playing the game until you reach the first ending. It’s recommended to focus on following the red “X” on your mini-map. You’ll need to follow this path four more times in Part Two.
If you’re looking for an easy spot to get the 50 and 100-hit combos miscellaneous trophies, there is an excellent location while you’re on your way to Shadowlord’s Castle. And since this isn’t a speed run, take your time enjoying the game by not skipping any of the cutscenes.
After the unskippable credits finish, the game will ask you to save. Save Slot A should be overridden when it does this. After completing this step, you will have earned the following:
- Release.
- Key Collector.
- Combo Fanatic.
- Combo Master.
- A World in Flux.
- Call Her Back.
Step 3. Complete the Part Two side quests and Ending B
After you finish Ending A, you’ll begin your game’s “Recycled World” quests. You can do them now or later; it’s totally up to you. If you want to wait, exit through the door, and you’ll start at the beginning of Part Two again.
Since you know what needs to be done to finish the game, take some time and Meep around completing all the side quests in this area first. You must finish the first quest at the Shrine before any others become available, but it will be manageable if you spread them throughout your story progression.
If you completed the recommended quests from Step 1, you should only have 22 more quests for Go-To Guy. There’s also a slim chance that you can start earning some of the time-based “boss” trophies on this playthrough (besides The Little Mermaid), but don’t strive for them, as they’ll be much simpler later on.
After completing the Fisherman’s Gambit quest line in Seafront, you can fish for rarer fish to finish A Round by the Pond. Remember to upgrade your weapons to their maximum and keep them equipped with the best words available so that fighting mobs will take less time.
If you choose to battle the Shadowlord, you will receive Ending B. You’ll be prompted to save your progress once the fight is finished. When that happens, make sure to overwrite Save Slot A. Once these steps have been completed, you will have earned the following:
- Village Handyman.
- Jack of All Trades.
- Go-To Guy.
- Fish of Legend.
- A Round by the Pond.
- Lingering Memories.
Step 4. Collect any missing weapons and complete Ending C
You must have collected all 33 weapons to unlock Endings C and D, so check the Weapons Collector if you’re missing any. If you missed getting any of the 3 Recycled World Quest weapons in Step 3, go back and get them now–you can access them through your Mom’s Diary inside your house.
The Phoenix Sword is the only weapon you need at the end of the game, precisely when you enter Shadowlord’s Castle. Even though it’s tucked away, don’t worry about picking it up last; make sure you get it.
Weapons aren’t the only things you need to take down the time-related “boss” trophies–you’ll also need brute strength. Starting on Ending C, The Little Mermaid will become available, and all other fights will be business.
If you miss any of those specific trophies here, don’t worry; you’ll have another chance when making your way to Ending D. Not only will you get The Little Mermaid cutscene, but an extra one also gives you Gratitude!
In addition to the two cutscenes, all ‘Novel Segments’ (black screen with white text) will also be completed, so Educated Warrior unlocks automatically. Only upgrade the weapons you’re using now, and constantly change your Words to more powerful ones if you find any.
After you defeat Shadowlord, one more enemy will appear. You have the choice to either sacrifice them or sacrifice yourself. If you choose to offer them, you will receive Ending C. Be sure to overwrite Save Slot A. After completing these steps, you should have earned the following:
- Gratitude.
- Dear Diary.
- Weapons Collector.
- Educated Warrior.
- Thank You.
Step 5. Speedrun
Before you permanently delete all progress on Ending D, make sure to finish your speed run. From the main menu, load up Save File B, which you initialized earlier. It would be best if you were adept at knowing where to go and what actions to take by now since this is your third time playing through the second half of the game.
Because this run is separate from your main competition, feel free not to concern yourself with completing side quests or upgrading anything. You can skip most fights by only focusing on the enemies required to open the door to progress.
The game’s second half can be completed in 1.5-3 hours, giving you plenty of time before hitting the 15-hour mark. And since you’ve already seen the cutscenes, go ahead and fast forward through them when they appear; they still add towards the countdown clock.
If you want to get through this part quickly, focus on completing the main quests marked with a red “X” on your mini-map. When you defeat Shadowlord, you can decide whether to save your game progress or not–it’s up to you.
However, if you choose to keep it, make sure NOT to overwrite Save Slot A; otherwise, you’ll have Steps 3 & 4 again. After finishing this step successfully, you will receive the following:
- Lightspeed Fighter.
Step 6. Complete Ending D and sacrifice yourself
You’re so close to the finish line! After you complete your speed run, you can go back and work on getting the Endings. From the main menu, load up Save File A, and you’ll be brought back to the beginning of Part Two.
Since you should already have all the weapons and completed most (or at least 30) quests, it’s time to book it straight to the end. If any of the “boss” trophies related to time eluded you before, try going for them now.
If you want to earn these trophies, note that each of these bosses has a mailbox next to them. You can use this mailbox to save/reload your progress and give yourself as many chances as you need. Additionally, use any magic or strength potions you have during this process.
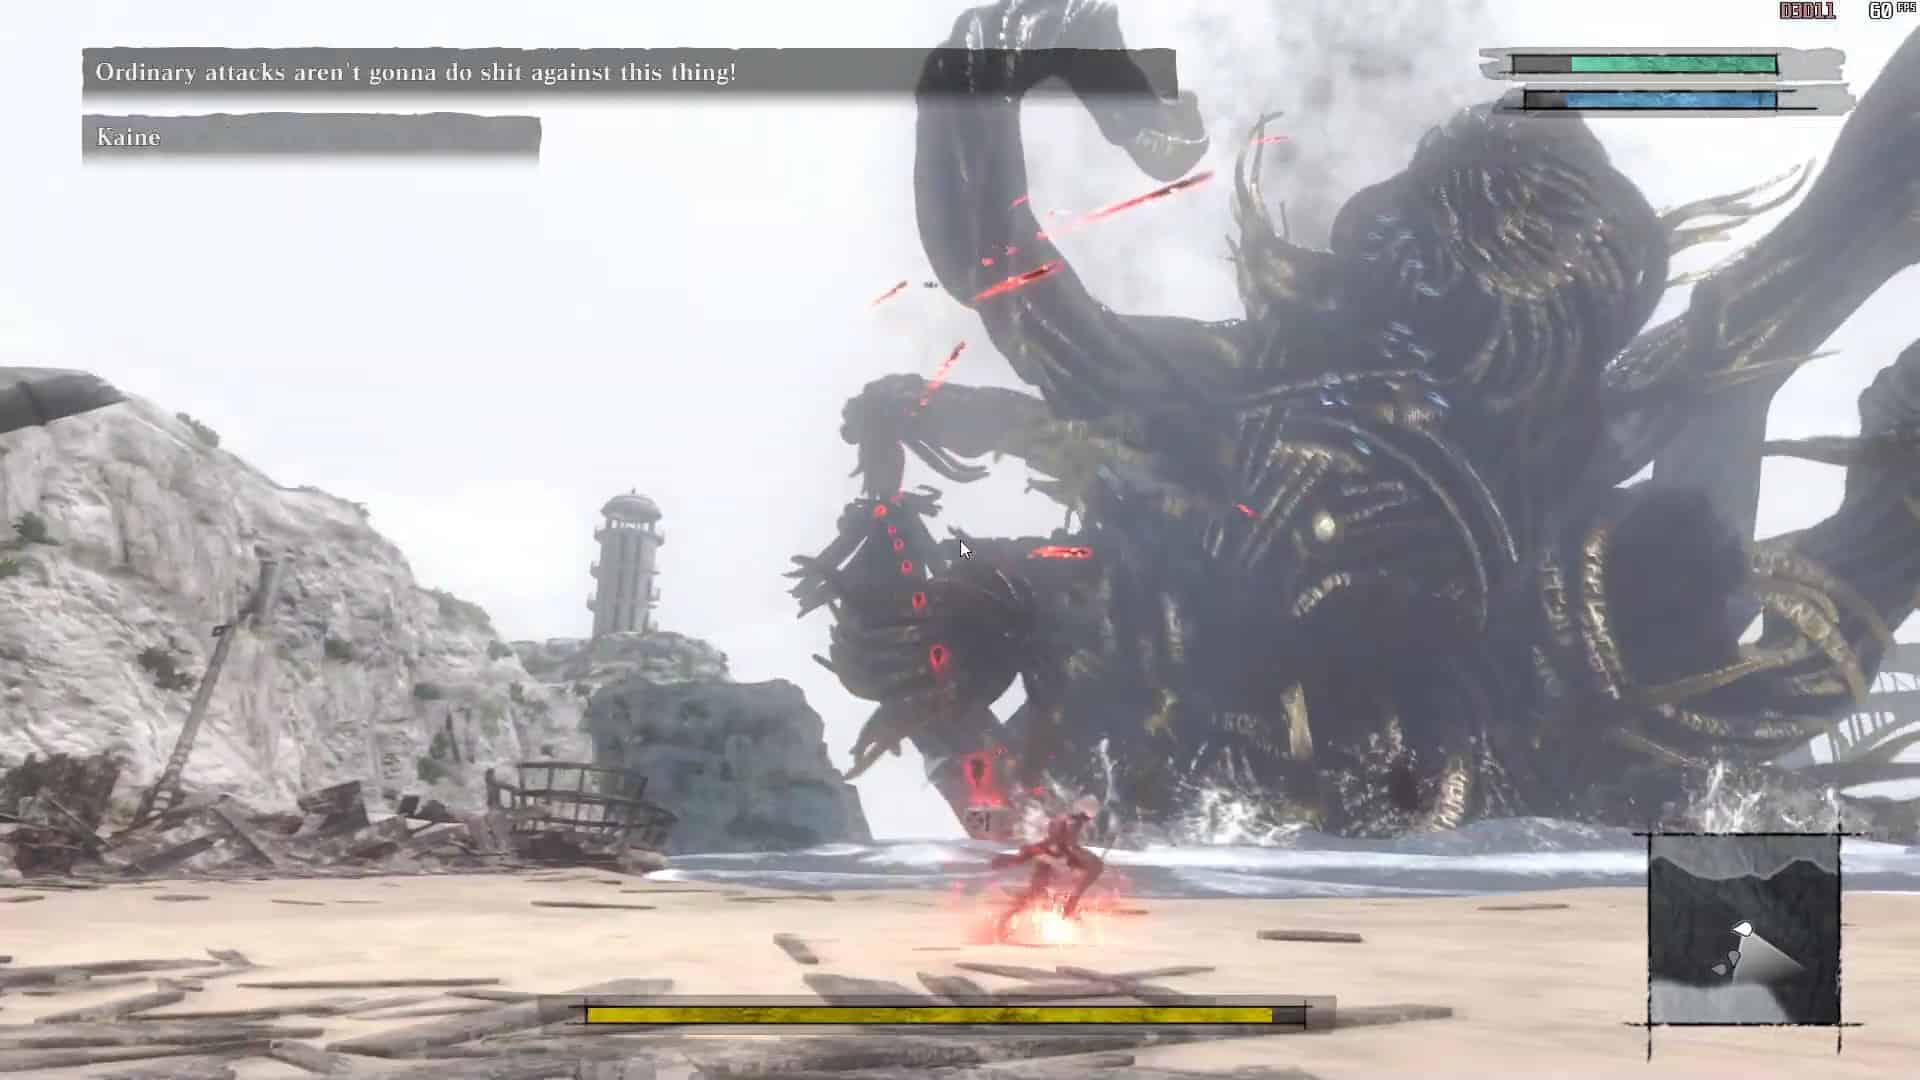
Out of all the battles, she felt like the trickiest one. Even with skipping cutscenes, those 5 minutes are very tight! After you defeat Shadowlord, one more enemy will confront you. After disposing of them, you’ll have two choices: A) Sacrifice the person, or B) Sacrifice yourself.
Choose option B to sacrifice yourself to receive Ending D. Delete all progress and save files associated with your character. Once this is done, you will earn the following:
- King of the Lost Shrine.
- A True Friend.
- Boss of the Junk Heap.
- Scourge of The Aerie.
- Protector of Facade.
- The Little Mermaid.
- Permission Granted.
- A Dirge for the Hero.
- Soul Crusher.
- Book Burner.
- The Once and Final King.
- The Strongest Bond.
- Something Very Special.
Step 7. Ending E and Clean-up
You’ll have to start a new game if you’ve deleted your saved files. When prompted, enter a different name for your player than the original one (you won’t be able to use the same word again) and progress through the story until you get to the first mini-boss in Part One of Aerie.
After defeating the boss, Kainé will act dramatically and die. Approach her as you would normally. You’ll enter a side adventure where you control Kainé. Get Daredevil before you finish this part of the game. Ultimately, you’ll be asked if you want to save someone important to you.
If you didn’t get Daredevil, choose “No” and reload your last saved data so that you can try again. If you have the trophy, select “Yes.” Afterward, type in the name of the person you cherish when prompted. By doing so, your saved file from Ending D will be restored.
After you select continue from the Main Menu, you’ll be brought to the beginning of Part Two in the game. Now is your chance to complete any tasks or goals you were unable to earlier. For example, if you still need to do so, this would be an excellent opportunity to harvest the Legendary Flower.
Furthermore, since “bosses” will reappear, you now have another chance at completing time-related trophies associated with them. By the time you’re done with the last ending and all of the clean-up, you will have earned:
- Daredevil.
- e8a898e686b6e382b5e383bce38390e383bc.
- Wordsmith.
- Man of Means.
- Legendary Gardener.
- Material Hunter.
- Upgrade Apprentice.
- Reform Specialist.
- Forging Master.
- The Final Verse.
Main trophies
There are 47 trophies in the game. Among them are 30 bronze, 14 silver, two gold, and one platinum. Let’s look closely at the main achievements.
The Final Verse
This is the final trophy you will earn in the game. To do so, ensure you have collected all the others first. It includes any that are missable, such as completionist-related ones. Once you have all of them, The Final Verse will pop.
Combo Fanatic & Combo Master
You’ll most likely get this trophy naturally if you’re taking out all the Shades in the Northern Plains (there won’t be too many at first, but by the end, there will be many of them). If you don’t want to take that chance, there is a straightforward way to get it.
The game’s second part will put you in the Lost Shrine for the final time, where you’ll battle a giant boar. After defeating it, another, more armored Boar appears. This one doesn’t die when you beat it, though. Instead, the creature revives and regenerates its health.
Even though this would be a pain under other conditions, it’s perfect for these trophies. After the Boar returns to life, it will stop attacking you, so you can sit there and repeatedly hit its face. Kainé and Emil will go through the next door to keep progressing the story but ignore them and keep shooting the Boar until it regenerates again.
Once you reach a 100-hit combo, the second trophy will unlock.
The Magic Man
The spells you cast in Grimoire Weiss are called the “Sealed Verses.” You learn them throughout the story quest line in Part One of the game. After defeating each main boss, they will drop one spell for you. By starting Part Two, you should have collected all of them.
| Magic | Location |
|---|---|
| Dark Blast | Lost Shrine – Releasing Grimoire Weiss |
| Dark Hand | The Aerie – Defeat Hook (First Encounter) |
| Dark Lance | Lost Shrine – Releasing Grimoire Weiss |
| Dark Gluttony | Junk Heap – Defeat Defense System Geppetto |
| Dark Phantasm | The Aerie – Defeat Hook (Second Encounter) |
| Dark Execution | Forest of Myth – Learned from Mayor |
| Dark Wall | Barren Temple – Defeat Shahriyar |
| Dark Whirlwind | Emil’s Manor – Defeat Grimoire Rubrum |
Wordsmith

To receive this trophy, you’ll need to grab hold of at least half of all the “Words” available throughout the game. These particular “Words” are dropped off by enemies (you should see them appear as a giant, green orb that your character will automatically pick up).
You can use these Words to enchant your weapons and magic with different statistics. Because there are so many words available, you will likely get this specific trophy once you reach Part Two during Endings C or D. Fortunately, you can raise the drop rate for these simply by using the Words collected thus far.
Go to your Grimoire and click on “Word List Edit.” Choose any weapon or magic you have equipped. Each item will have two slots that show different stats, like attack power or drop rate. We’re looking for the second slot for miscellaneous stats like XP or DoT.
By equipping a specific set of words, you could see an increase anywhere from 5% to 30%. Copy and paste whichever word gives the highest % on each equipped weapon and magic. You can use a few – a little goes a long way with this method. You will see an improvement in the word drop rate, all available mats, and pots.
The words you’re looking for are:
- Mah +2%;
- Mahir +4%;
- Mahes +6%;
- Mahka +8%;
- Mahza +10%;
- Mahira +12%;
- Mahesra +15%;
- Mahkarr +20%;
- Mahzarr +25%;
- Mahzarken +30%.
The percentage of words you have collected displays on the first menu in “Word List Edit” under your Grimoire. When it reaches 50%, you will unlock the trophy.
Weapons Collector
You must gather all 33 Weapons to get Endings C, D, and E (you only need Ending E’s weapon if you’re going for the super OP trophy). There are 33 in the main game, four more in included DLC, and one last mighty weapons you earn after completing Ending E.
You don’t need any of the 4 DLC weapons or the one achieved from finishing Ending E for this trophy – just the 33 main-game weapons. Ten weapons can be bought from vendors in different towns throughout the game.
In total, you’ll need 212,800 gold to buy them all. It would be best to have enough money to cover everything by completing sidequests in Part Two of the game. The list of weapons is below.
The Village (Blacksmith):
- Lily-Leaf Sword – 2400G;
- Beastbain – 16800G;
- Axe of Beheading – 19200G;
- Sunrise – 21600G.
Facade (Weapon Dealer):
- Earth Wyrm’s Claw – 8400G;
- Captain’s Holy Spear – 30000G;
- Phoenix Spear – 37400G.
Seafront (Weapon Shop):
- Phoenix Dagger – 36200G;
- Vile Axe – 21600G;
- Spear of the Usurper – 19200G.
You’ll automatically receive seven weapons as you advance through the story, so don’t fret about accidentally leaving any behind:
- Ancient Overlord;
- Iron Pipe;
- Iron Will;
- Kusanagi;
- Nameless Blade;
- Rebirth;
- Transience.
Eight weapons you can obtain from completing quests are:
- Faith. In Part One, during the Forest Myth questline, you’ll have to help the mayor wake up from a dream. In addition, two other villagers in the same area must be woken up. Doing so will get you the weapon. Each of the two villages has a text puzzle with different solutions for each person.
- Fool’s Accord is a prize for completing the third “Recycled World” Quest/Area. You can only acquire it after you’ve beaten the game once.
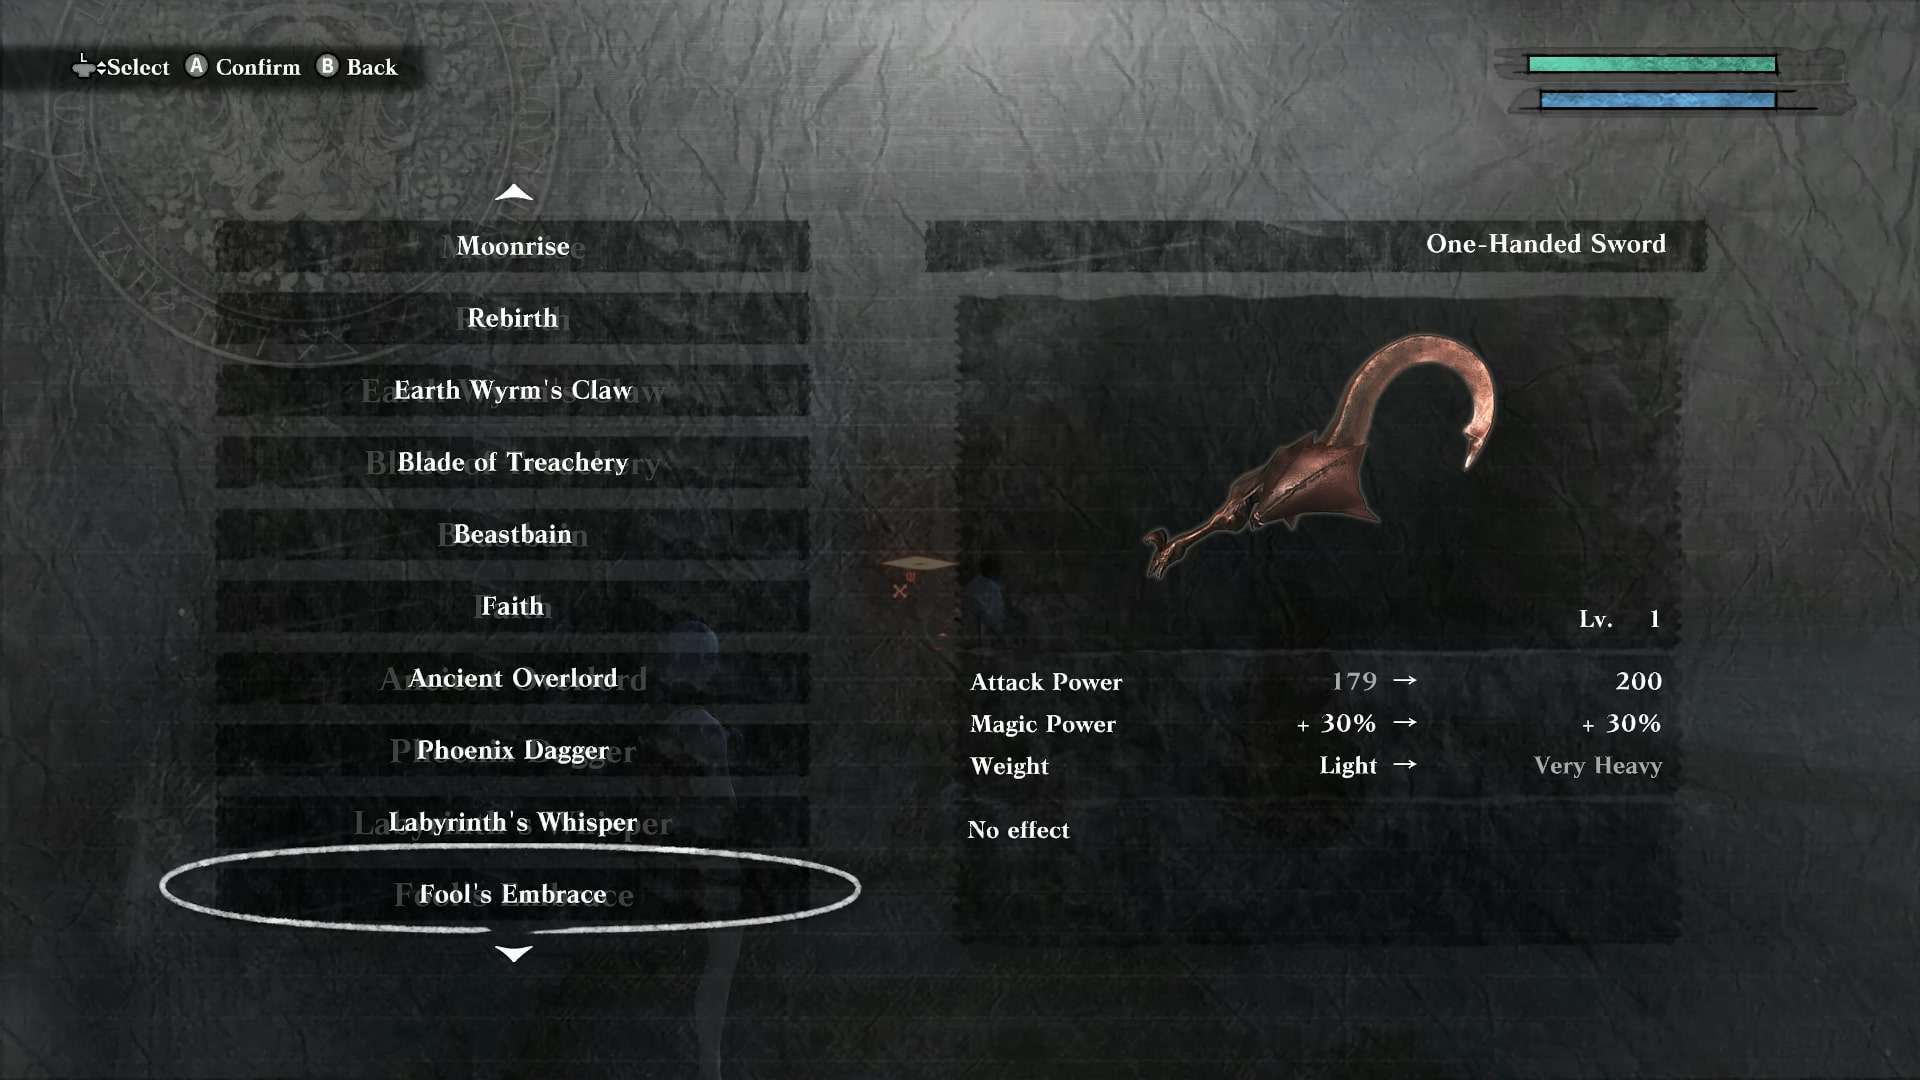
- Fool’s Embrace. After you finish the storyline for the first time, you will gain access to the “Recycled World” Quest/Area. Upon completion of this area, you will be rewarded.
- Fool’s Lament is a reward you receive for completing the second “Recycled World” Quest/Area. It becomes available after you complete the game the first time.
- Upon completing the side quest, The Damaged Map, Labyrinth’s Shout will be gifted to you.
- Completing the side quest “Disturbing the Sleep of Kings” will award you with Labyrinth’s Song.
- You can obtain Labyrinth’s Whisper by completing the side quest The Bridge in Peril.
- You earn the Moonrise when you rescue the man attacked by Shades in the Southern Plains.

You can find the other 8 Weapons while exploring during the story. Their locations are:
- The Blade of Treachery is located Inside Emil’s Manor. After you progress through the Manor and meet the Butler, Emil will join you. When you use the Darkness Key, a hallway fight against some Shades commences. There’s a crate on the left side of the hallway which, upon being broken, holds a weapon inside it.
- Nirvana Dagger – inside the Lost Shrine. You will reach a point in your journey where you must climb two ladders, one after the other. When you reach the first ladder’s top, a crate will be next to you, containing the weapon inside.
- The Beastcurse is located in the laboratory on floor B2 of the Junk Heap. You will need to fight P-33 before you can obtain it.
- Beastlord – inside the Lost Shrine. After you go up a few floors, you’ll come back outside. Continue moving forward, and you’ll encounter ladders; afterward, in front of a big door with a mailbox on the left side and a crate on the right, you will find the weapon inside said crate.
- The Dragoon Lance is found inside the Lost Shrine. You’ll know you’re in the right place if you “defeat” Roc, an armored being. Afterward, go through the doors and open up the first crate on your right to find this weapon.
- You can find the Fang of Twins inside Emil’s Manor in the basement. You’ll know you’re in the right place when you see a bird’s eye view camera angle. Shortly after that, you’ll enter a room with several boxes. Going through a hidden section on the left wall would be best. Once you get to another side of that secret passage, the weapon will be down by the wall near some crates. You can break open those crates by destroying the wall, so it should be easy to spot.
- Phoenix Sword. To enter the lost Shrine, go to Shadowlord’s Castle, and you’ll see an orb. When Weiss answers three questions, the door will unlock. Before going through, the weapon is in a crate on your left.
- To find the Devil Queen weapon in Part Two, take a boat to the Lost Shrine. Climb up the first ladder and walk to the second. Just left of that ladder are two crates – one on top of the other. The weapon is inside the bottom crate on your left-hand side.
You can acquire an extra weapon in the game by finishing Ending E. However, you don’t need this bonus weapon to get the trophy. Once you have all 33 regular weapons, the achievement will automatically unlock.
Jack of All Trades, Village Handyman, and Go-To Guy
The game has more than 30 side quests you can complete in any order. If you’re following the walkthrough, you’ll earn these achievements in Part Two. The side quests will not appear on your mini-map, save for the icon of the person/s giving the search.
Whereas an average villager will appear as a grayed-out dot, the side quest givers will appear as a white circle with a black dot. You should be able to find and turn them in more easily now. If a quest is not appearing for you, you need to progress further into the story to unlock it.
Part I:
| Quest | Location | Special Notes |
|---|---|---|
| Herbal Remedies | Your village, Popola | |
| The Lost Eggs | Your village item shopkeeper | |
| The Gatekeeper’s Errand | Your village, Northern Plains gate guard | |
| Shopping List | Village florist | Unlocks the ability to use your garden. |
| Old-Fashioned Home Cooking | Your village, woman by fountain | |
| The Tavern Keeper’s Grandmother | Your village, tavern keeper | |
| Book Smarts | Your village, girl in the library | |
| Boar Hunt! | In the village, a man next to the item shop. | Unlocks the ability to ride boars for All Aboared! |
| A Return to Shopping | A Village Florist | To unlock this quest, the “Shopping List” must be completed. |
| On the Wings of Eagles | The village, tavern keeper | To unlock this quest, “The Tavern Keeper’s Grandmother” must be completed. |
| Yonah’s Home Cooking | Your village, Yonah | |
| Fragile Delivery 2 | Your village, older man by the fountain | To unlock this quest, “Fragile Delivery” must be completed. |
| Fragile Delivery | Your village, Northern Plains gate guard | |
| The Ballad of the Twins | Your village, man in the tavern | |
| The Fisherman’s Gambit (1-5) | Seafront, a fisherman on the dock | This questline remains available in part 2. |
| The New Merchant in Town | Man on a boat at the pier (Seafront) | |
| A Dog Astray | Your village, older man by the blacksmith | |
| The Lighthouse Lady’s Wrath | Seafront, the Post Office | “The Postman’s Request” must be completed to unlock this quest |
| The Postman’s Request | Seafront, the Post Office | |
| Letter to a Lover | Seafront, a man near the fountain | |
| Closure | Seafront, the Post Office | |
| Yonah’s Gift | Your village, Yonah | |
| Bon Appetit! | Seafront, the tavern keeper | “A Signature Dish” must be completed to unlock this quest. |
| A Signature Dish | Seafront, the tavern keeper | |
| Item Unkown | Facade, a person near the King’s Mansion | |
| Fragile Delivery 3 | Your village, Eastern Road gate guard | “Fragile Delivery 2” must be completed to unlock this quest. |
| The Tangled Message | Facade, a soldier in the middle of the city | |
| Apology from a Fool | Facade, strange-thing shopkeeper | |
| The Runaway Son | Your village, man in the marketplace | |
| The Missing Girl | Facade, a woman near the strange-things shop | |
| The Pride of a Lover | Seafront, resident at the base of the lighthouse | The resident will have to be talked to 3 times after visiting Facade for the first time. Only after that will the quest unlock. |
| The Littlest Hero | Facade, weapon shop owner |
Part II:
| Quest | Location | Special Notes |
|---|---|---|
| The Masterless Lighthouse | Seafront, resident outside the lighthouse | |
| The Scattered Cargo | Seafront, older woman by the fountain | If you complete this quest successfully, you will be rewarded with 20,000 gold and a discount at the Seafront item shop. However, if you turn in the cargo to the authorities, you will only receive 50,000 gold. |
| The King’s Mask | Guard in front of the King’s Mansion (Facade) | |
| The Strange Fate of the Jewel | Seafront, woman by the port | |
| The Fisherman’s Gambit (6-9) | Seafront, a fisherman on the dock | To continue this quest line, “The Fisherman’s Gambit (1-5)” must be completed first. |
| Thieves in Training | Your village, the item shopkeeper | |
| Contract for a Contractor | Your village, man by the north gate | |
| Staying Afloat | Seafront, resident by the port | |
| The Faded Fountain | Your village, guardian by the fountain | To unlock this quest, “The Creaky Waterwheel” must be completed. |
| The Creaky Waterwheel | Your village, woman by the item shop | |
| The Damaged Map | Your village, the blacksmith | Upon completing this quest, you will be awarded a weapon for your Weapons Collector. You must complete this quest to get endings C and D. |
| Life in the Sands | Facade, woman by the mailbox | |
| Master of the Southern Plains | Seafront, the Post Office | |
| A Bridge in Peril | Your village, Northern Plains gate guard | By finishing this quest, you will receive a weapon as compensation for your help. You need to complete the quest to get endings C and D. |
| A Tale of the Study | Emil’s Mansion, the butler | |
| A Child’s Final Chance | Your village, the grocer | |
| The Great Tree | Seafront, resident by the item shop | |
| Research Project | Emil’s Mansion, the butler | To unlock this quest, you must complete “A Tale of the Study.” |
| Learning a Trade | Man on a boat at the pier (Seafront) | To unlock part II, “The New Merchant in Town” must be completed for this quest. |
| The Promised Gift | At any ferry location, the ferryman | Once you have obtained it, you can no longer quest for the fourth key fragment. |
| The Shade Army | Junk Heap, Gideon | |
| Bon Appetit! 2 | Seafront, the tavern keeper | To unlock in part II, “Bon Appetit!” must be completed for this quest. |
| A Shade Entombed | Facade, guard by the entrance | Once you complete this quest, you can access another that will give you a weapon as a reward. You need to finish this one to get C and D endings. |
| A Memorable Knife | Seafront, the tavern keeper | |
| Nightmares and Dust | Facade, resident by the entrance | |
| A City Reborn | Facade, the guard at the King’s Mansion | |
| Shadows of the Desert | The Desert, masked person by the ferry | To unlock part II, “The Missing Girl,” from part I must be completed. |
| Disturbing the Sleep of Kings | Facade, the King in his Mansion | To complete this quest and unlock endings C and D, you must “A Shade Entombed.” Not to mention, this will also give you a weapon for the Weapons Collector achievement. |
| Freesia | Seafront, a man above the blacksmith | “Letter to a Lover” from part I must be completed for this quest to unlock in part II. |
| Search for the Shade | Your village, Southern Plains gate guard | |
| The Magical Stone | The Forest of Myth, fortune teller | This quest is not required, but if you complete it before getting ending B, it will reward you with the Iron Pipe early and the ability to enter your dream. |
| The Despicable Man | Your village, woman in the market |
Man of Means
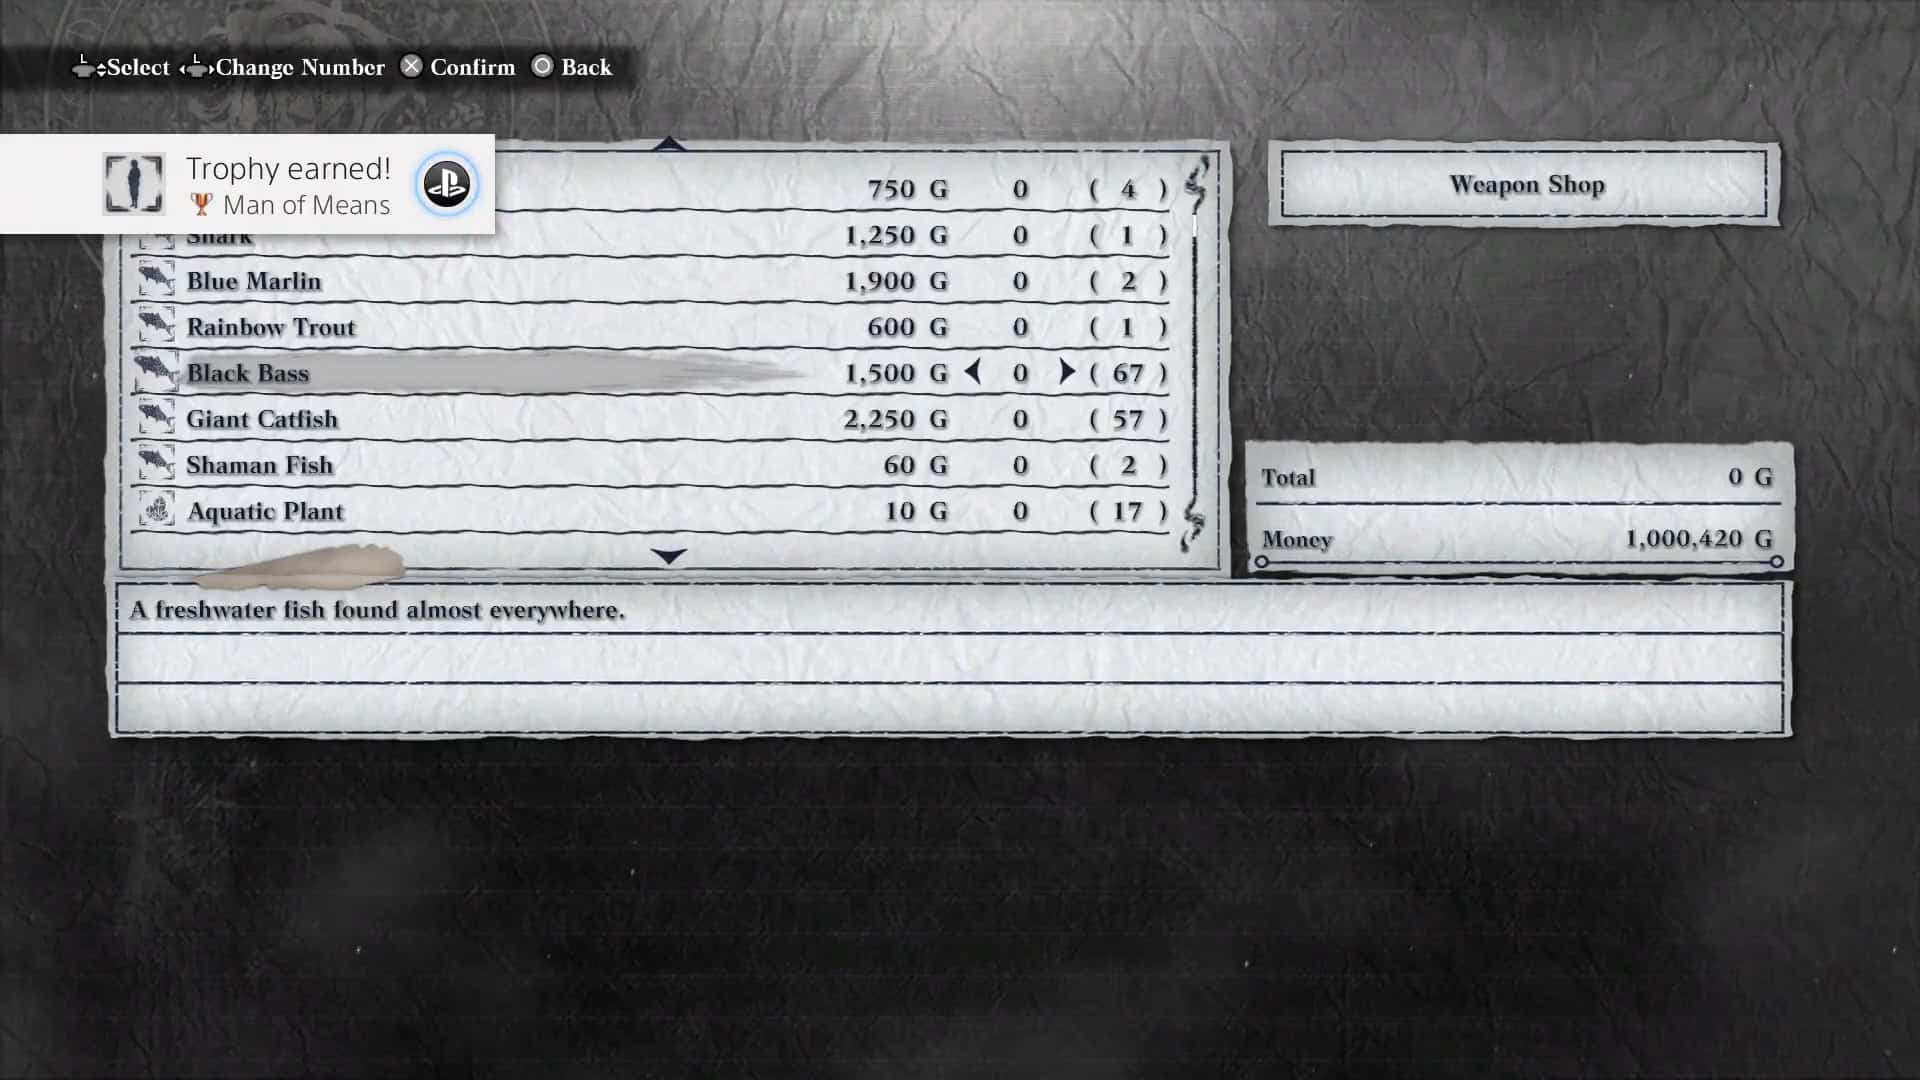
You can purchase weapons after getting the trophy, but it’s recommended. The grinding for it isn’t too bad, so if you want to save gold for Endings C and D, that’s okay. Note that this trophy is not cumulative – all 1 million pieces of gold must be in your inventory at one time.
You can easily farm gold in two locations. Your choice depends on whether you have completed all of your weapon upgrades.
“Recycled World” Quest 3
The 3rd quest in the Recycled World will be your best friend if you want money and raw materials for upgrading your weapons. The Recycled World quests open up after you beat the game once, and you can get there by interacting with your Mom’s Diary inside your house (next to the front door).
Once you complete the first quest, the second will unlock, and so on. The third quest should take approximately 15-20 minutes to finish and nets 50,000G each time. The trophy will open as soon as your money total reaches 1,000,000G.
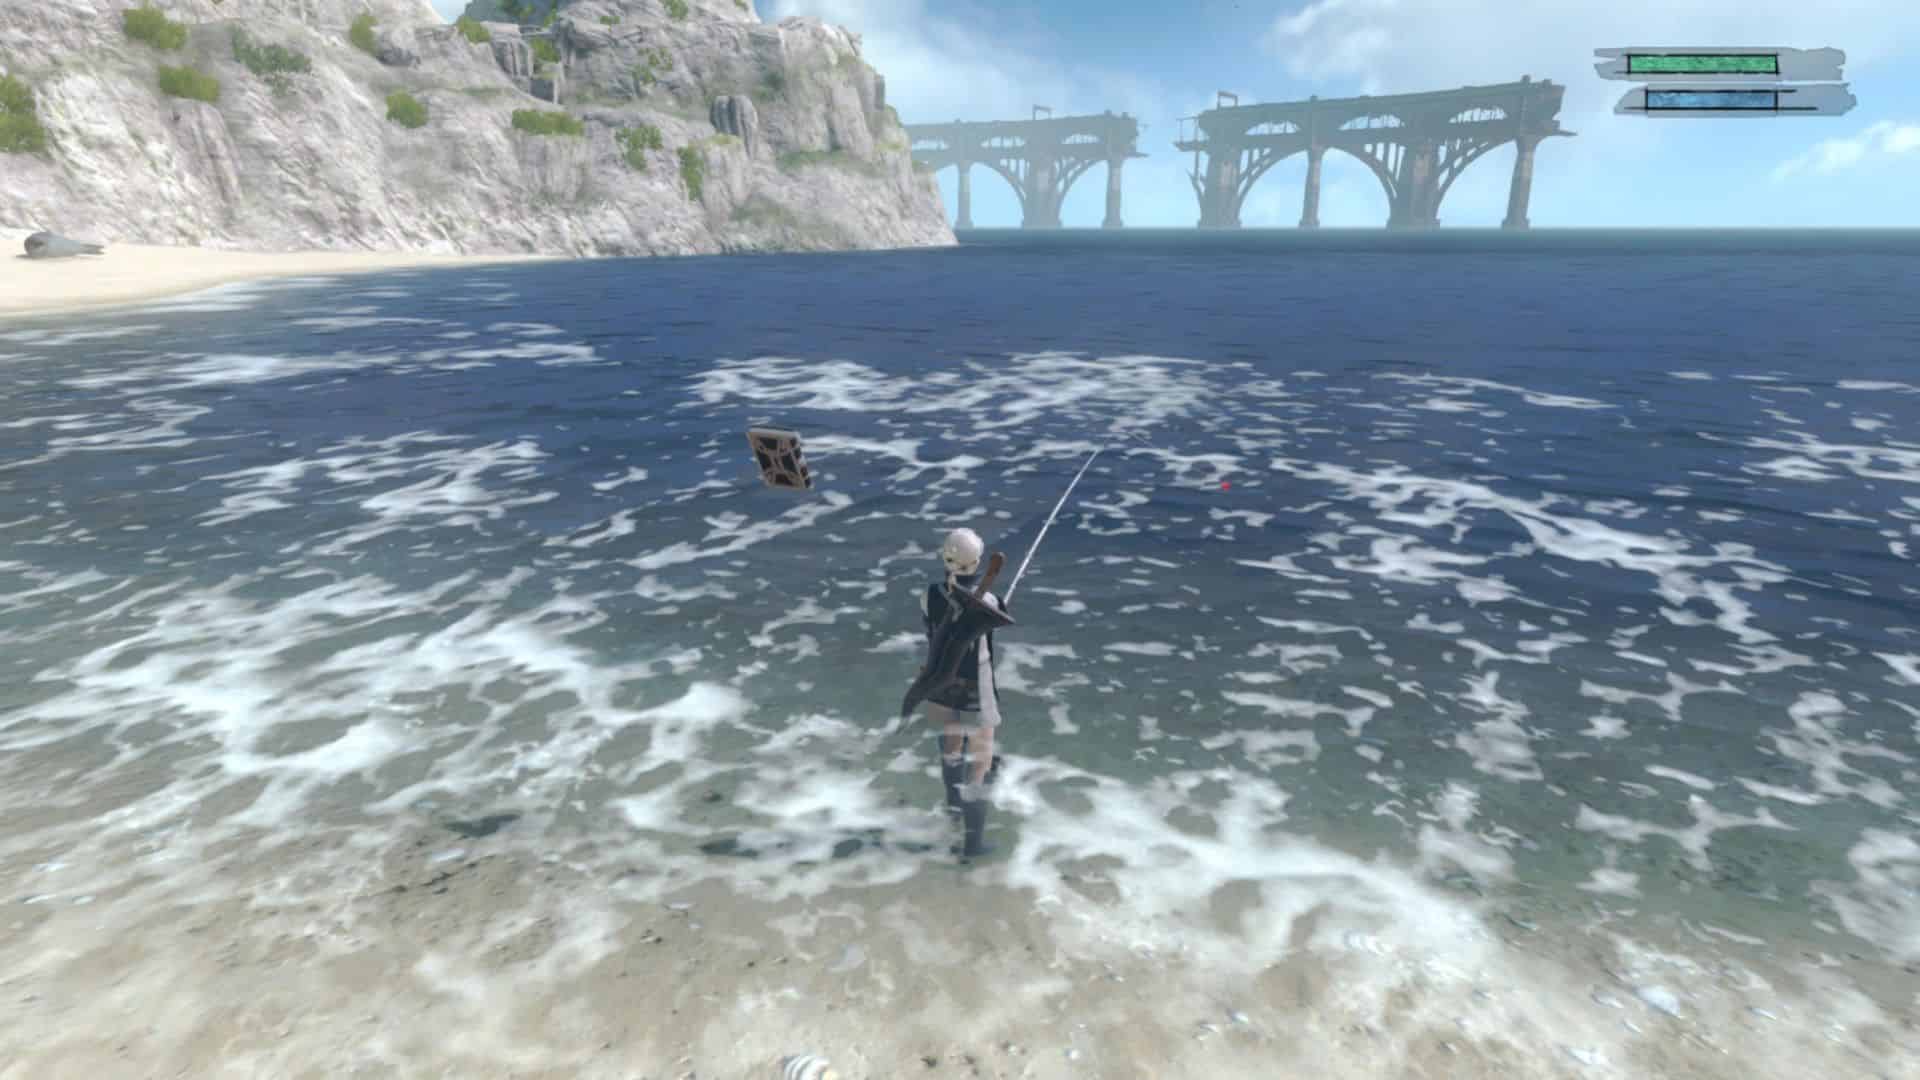
Fishing in the Desert
The fishing spot in the Desert is ideal for anyone looking to make money without picking up raw materials for weapon upgrades. Make sure you have finished the Fisherman’s Gambit quest line first, pack some Sardines, and head over to the Desert.
Continue fishing when you’re ready, using either the Lure or Sardines. You will catch some trash fish, but you’ll also reel in 3 of the game’s most popular fish: Sandfish (Lure, worth 2,500G each), Hyneria (Lure/Sardines, worth 6,000G each), and finally, the much sought-after Rhizodont (Sardines bait only, nets 12,000G).
You can fish for approximately 30 minutes to snag enough seafood to net you close to 200,000 gold. Afterward, sell your loot at the vendor in Seafront and buy more sardines if needed – then rinse and repeat until you’ve made 1,000,000 gold.
Educated Warrior

The game is broken into segments that look like a black screen with white text – similar to how a novel seems. You’ll start to see these as you progress through Ending B, and they’ll continue until you reach Ending C. If you don’t want to read the full text, hold down or fast-forward it.
There are no follow-up questions to the text-based puzzles in the Forest of Myth. The game will ask if you wanna read the segment before it plays – just hit “yes.” If any parts are missed, they’ll get all replay as you make your way to Ending D.
King of the Lost Shrine
It would be best to get this trophy when focusing on Endings C or D or after you finish Ending E. The reason being is that you’ll receive a much better weapon as a reward for completing Ending E.
Gretel is the boss you need to defeat in Part Two when you return to the Lost Shrine for a quest related to the story. The fight is easy, so you won’t have much trouble completing it in time. You can use melee attacks or spells against her during the first part of the battle.
Gretel will go from being vulnerable to putting up a shield. Once the protection is raised, you must lure the Shades she created into sunlight beaming down from the ceiling. The heat will damage or kill them, and it only takes one or two before Gretel becomes angry, lowers her shield, and begins attacking again.
Wait for her to attack, and then retaliate. This will happen a few more times until she reaches her last “form” (for lack of a better term), where she quickly spins around the room, attacking anything in her way. Get out of the way when she gets close and uses magic to defeat her.
The timer starts as soon as the fight begins, and cutscenes that play during the fight count toward the timer, so make sure to skip them once they appear. After you defeat her, the trophy will unlock if it is within the given time limit.
A True Friend
Complete Ending E for the most potent weapon, or wait until you’re near the end of Endings C or D to do this trophy. After you battle Gretel and become the King of the Lost Shrine, you’ll face Berserk Kainé.
It’s not your friend Kainé that you’ll be fighting against, but the Shade that has taken over her temporarily. The Shade moves around quickly, so it will be beneficial to use magic attacks to get them down from the walls.
Then run or roll toward them and do some melee magic damage. Use a Strength and Magic potion to take her down more quickly. You can also skip cutscenes that appear. The trophy will unlock if you defeat her in one minute or less.
Boss of the Junk Heap
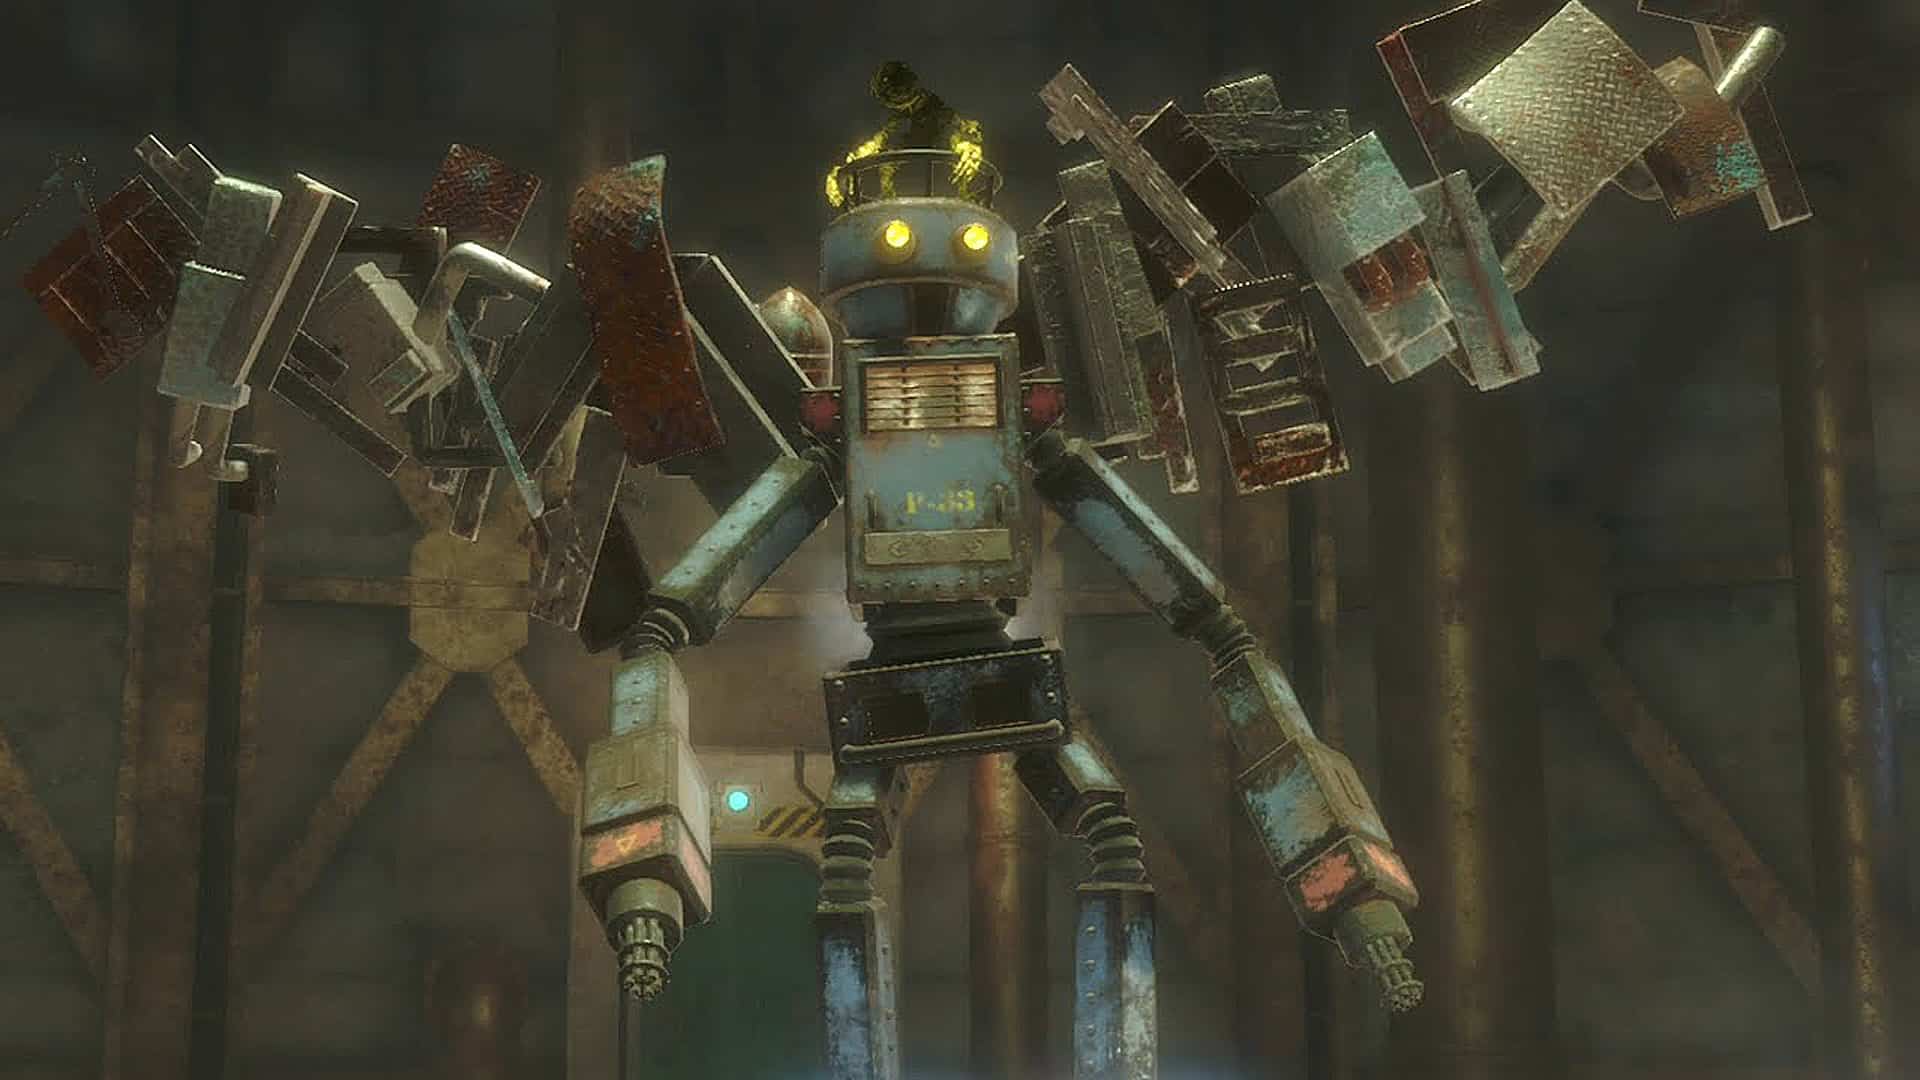
Completing this trophy is recommended during Endings C or D or after you finish Ending E since you will be rewarded with a powerful weapon. After you return to the Junk Heap, one of the brothers you met will tell you about an adventure he and his brother went on.
Then, he’ll offer you a new weapon that needs to be repaired. Once you collect the required materials, improve the gun and make your way back through floor B2 until you reach a large hole in the ground. Jumping down into it will start the fight against P-33.
Reach Ending C or D, and he’ll go down quickly. If you have Dark Blast equipped, hold the button for that spell and melee him while it’s going. He’ll lift a foot periodically and stomp it down, sending out an electrical current you need to dodge.
If you stay too close, he can also turn the ground around into a pool of electricity – be mindful of this! Around the time he reaches 50% HP, he’ll take off into the sky and seemingly break through the ceiling.
Debris will start to pour down from above, so watch for their shadows and dodge accordingly. Once he comes back down, keep attacking him until he flies up again—he’ll only do this twice more before you can finally finish him off.
Again, Dodge any falling debris when necessary. Skipping the cutscenes that play during the boss fight will help you save time, so be sure to do that. You can also use your strength and magic potions to make your attacks more powerful. You will unlock the trophy if you defeat the boss within the required time limit.
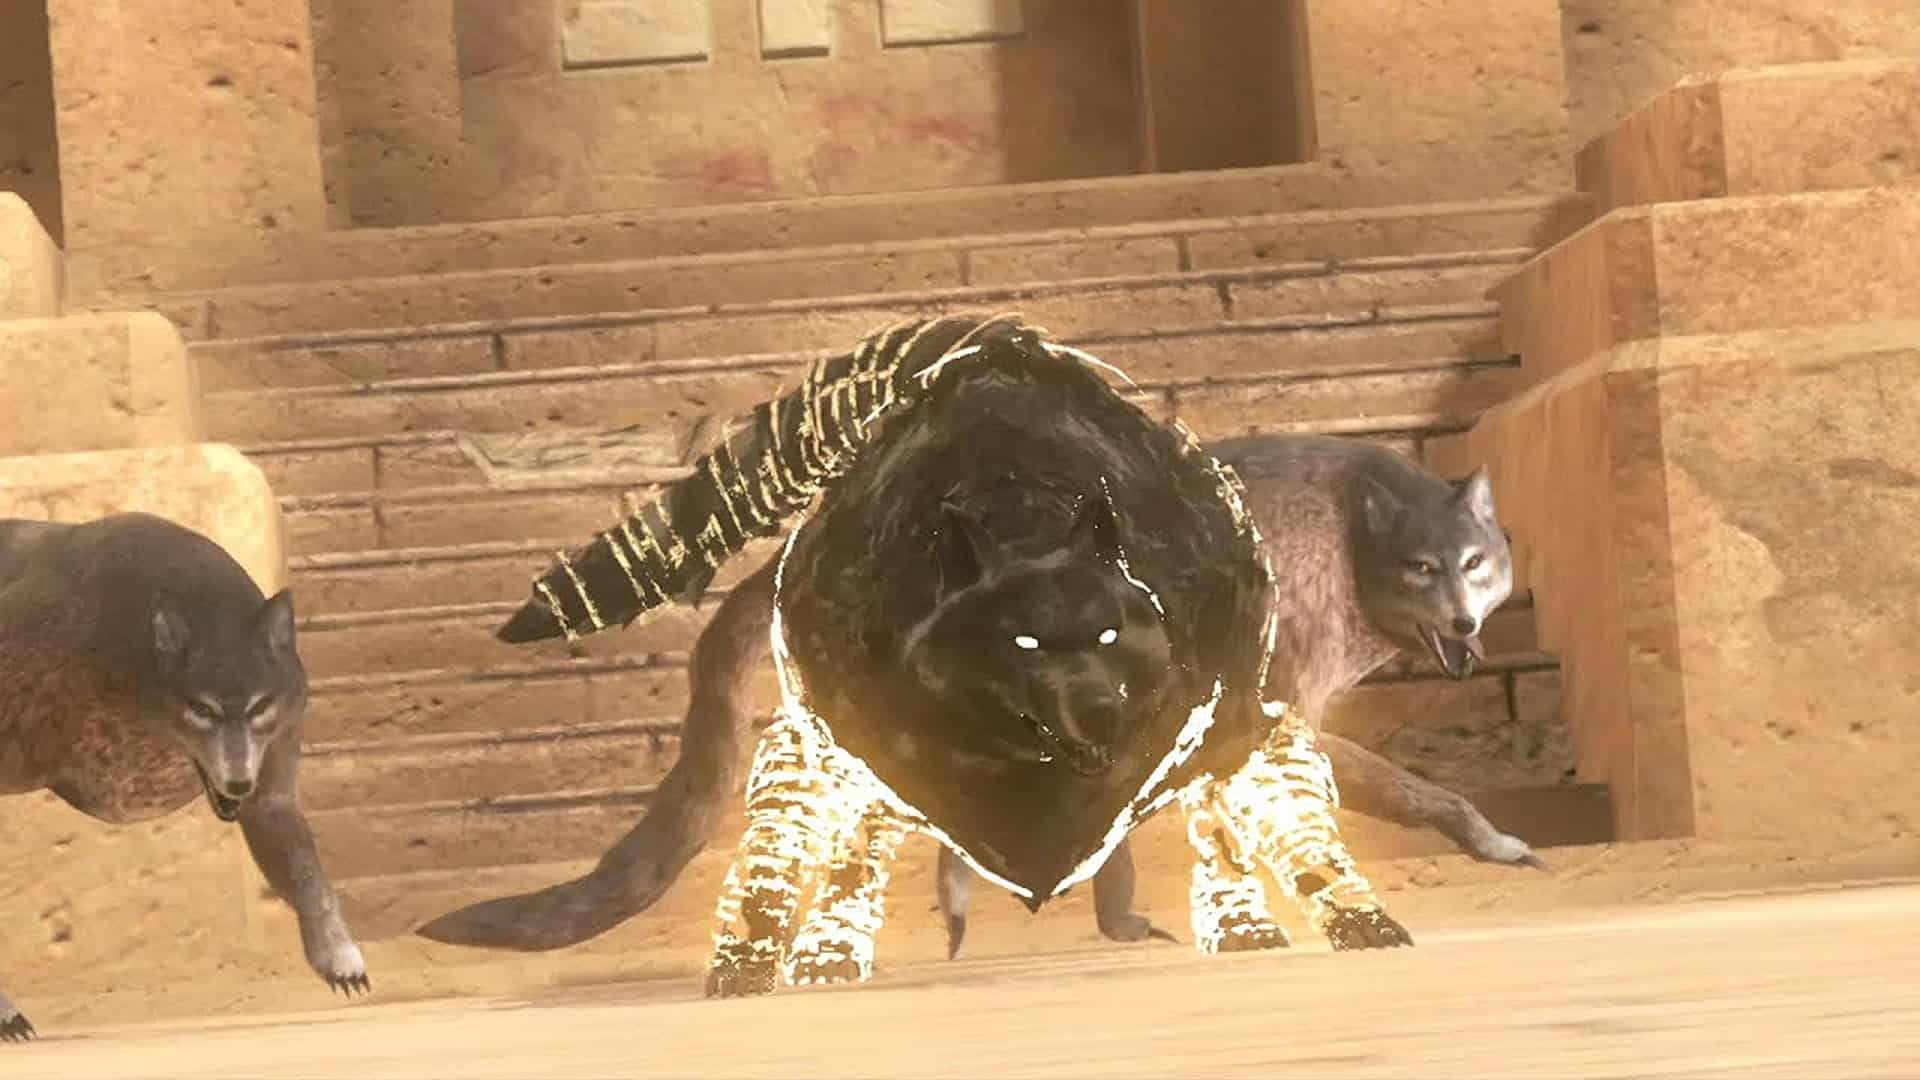
Scourge of The Aerie
Postponing this task until you’re focused on Endings C or D or after completing Ending E will be much simpler. Wendy is your next boss after Popola sends you to investigate Aerie in Part Two. This battle will require more movement than previous fights.
The moment Wendy appears (after fighting a few minor enemies), the action will begin. For this fight, use your spells/magic attacks with only occasional weapon strikes on smaller enemies that try to get in your way.
Wendy is a giant orb protected by void tentacles. You need to attack her eye, but be careful of her shield. Emil and Weiss will tell you when to move to a “higher area.” Shoot Wendy from the bridge after making your way up the scaffolding.
Some trash mobs might get in your way, but they’re easy enough to take out. Wendy will go to the first platform you cross when you enter the Aerie when she reaches about 25% HP.
You can circumvent her or jump off onto it (if you decide to jump, make sure to double jump or dash right before hitting it, so no damage is taken). Use magic attacks/spells exclusively to finish burning her down. To obtain this trophy, defeat her within the required time limit and skip any cutscenes that pop up.
Protector of Facade
The consensus is that you should save this trophy until you’re focusing on Endings C or D or wait until after you’ve completed Ending E. The reason being is that you’ll be rewarded with a much more powerful weapon if done in that order.
The Shade Wolf, Roc, is the one you’ll face in the Desert upon your return to Facade in Part Two. After an unfortunate event where you take on Roc and supposedly the last of the Wolves in the Desert with only The Facade King and a small army, you learn that what they told you was a bald-faced lie.
Roc starts by staying on top of the rock wall while waves of ordinary wolves drop down into battle. The King is their primary target, but they’re all pretty weak compared to other enemies. If you focus on one and use Dark Blast, you can take them out quickly.
Once they’re downed, Roc will jump into the fight area, where you can start damaging him. His shield is something to watch for – he might need to find a way to deploy it based on how easy he is to defeat. This battle should last 3 1/2 minutes at maximum.
Make sure to bypass any cutscenes, and once you’ve defeated him (within the time limit, if there is one), the trophy will unlock.
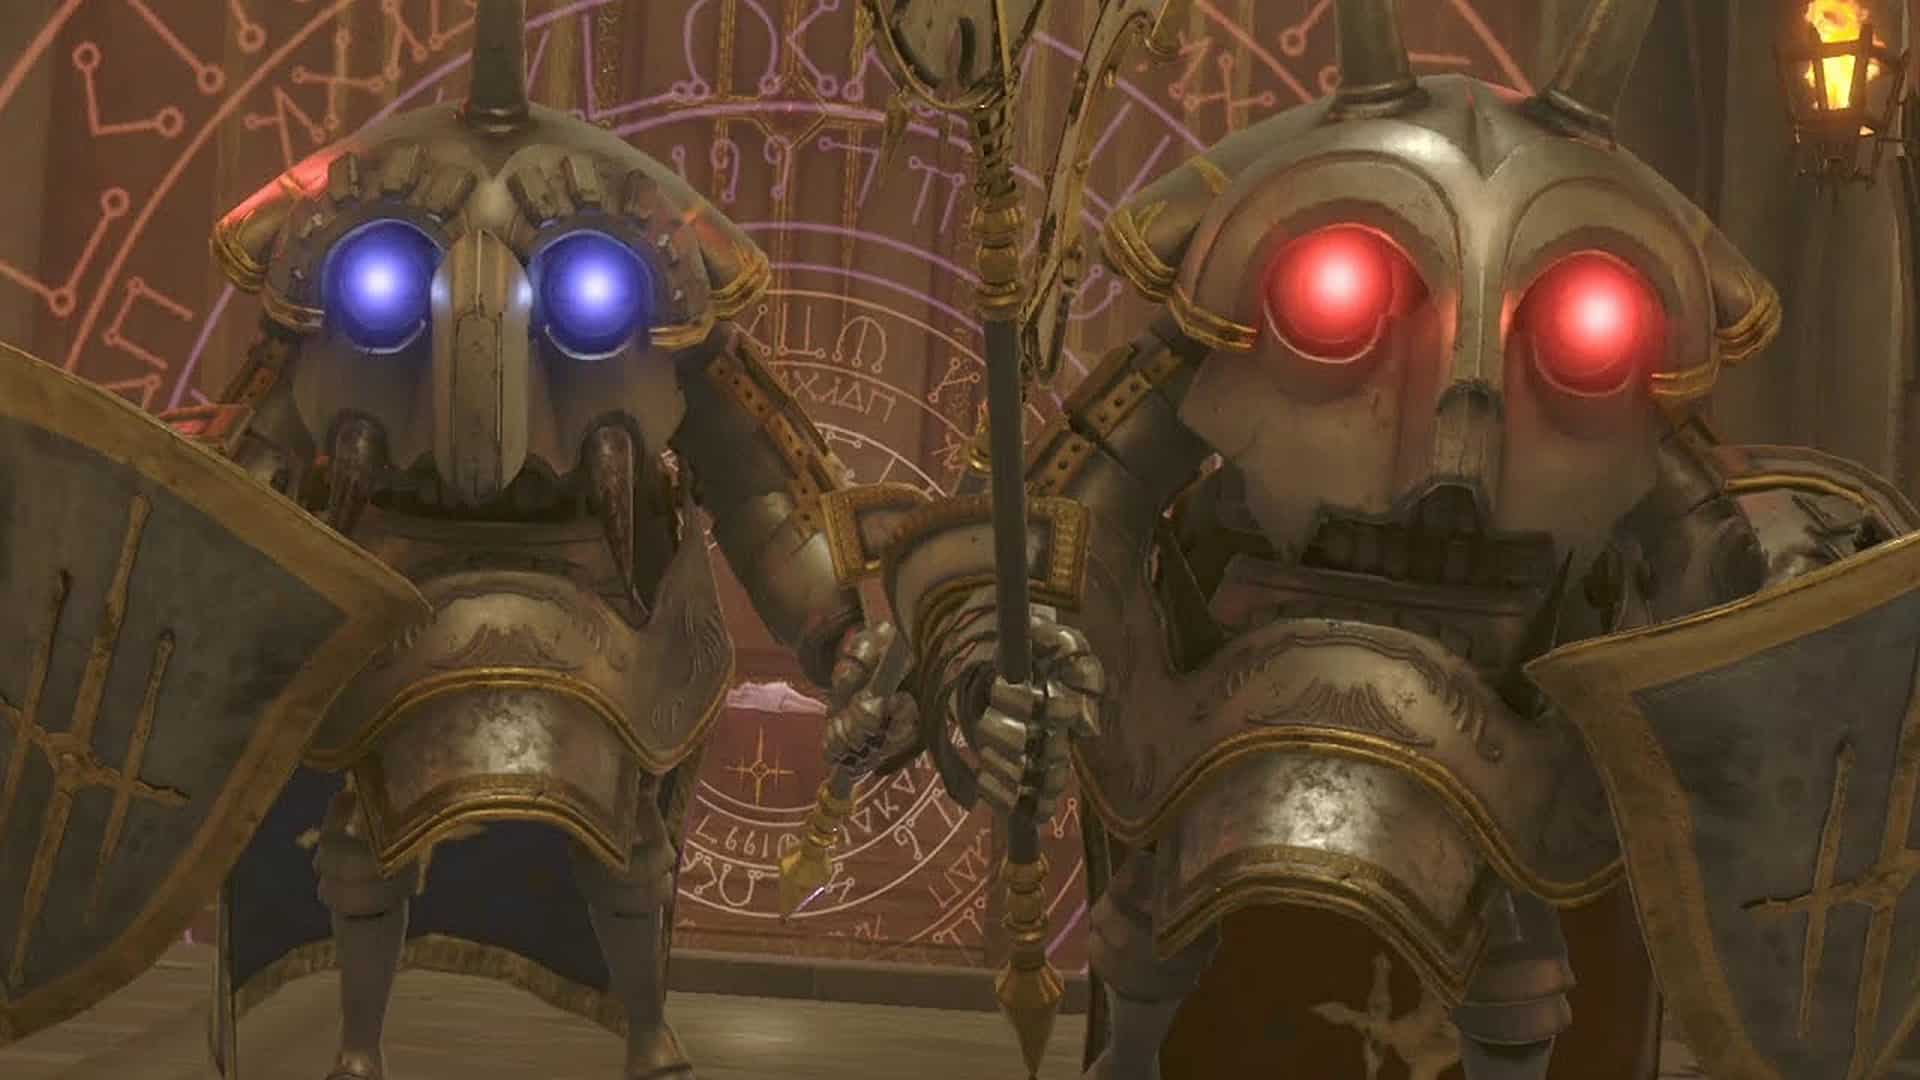
Permission Granted
It’s recommended you wait to do this trophy until you’re working on Endings C or D since you’ll get a super OP weapon from that run. Or, if you prefer, wait until after you’ve completed Ending E. You’ll come across Devola and Popola twice when you explore the Lost Shrine for the final time.
The first time, rather than “defeating” them, you’ll manage to drive them away. This is where you’ll get the trophy mentioned previously. Even though they both appear at once, feel free to focus your attacks on a single one since they share a health bar.
These guys aren’t tough, but they will move around a lot. Keep your distance and spam them with spells or magic attacks until their pink shields are up — if you’re too close when this happens, they’ll knock you back.
Their shields will disappear after some time, signaling that you can attack again. Aim to charge up your Dark Lance and Dark Hand attacks if possible. Eventually, they’ll start using these same maneuvers against you, but I found them to be the most destructive.
You can spook them in approximately two minutes. Remember to pass up on any cutscenes that come up, as those add additional time to the clock. Once you’ve sufficiently scared them away and it’s within the required timeframe, the trophy will unlock.
A Dirge for the Hero
It’s recommended you wait to do this trophy until you’re working on Endings C or D, or wait until after you’ve completed Ending E since you’ll get a potent weapon from that run. If you have yet to become a Combo Fanatic or a Combo Master, you can obtain that title during this fight.
After you walk through the Lost Shrine, you will come across a ballroom with some “ghost couples” dancing. However, when they try to leave from the door on another side of the room, they turn into Shades. Elimination of all of them is required for Goose’s appearance.
There are two parts to this battle. During the first section, Goose does not have any armor. Although it may be difficult, you need to stand your ground near a wall so that she runs into it when she charges you in full force instead of inflicting any damage on you.
Attack her while she’s down; there’s a vulnerable red spot on her back that you should aim for. Even if your attack isn’t precisely aimed at the weak spot, more often than not, it will still land on target due to the angle from which you’re hitting her. Keep repeating this process until V Elizabeth is defeated.
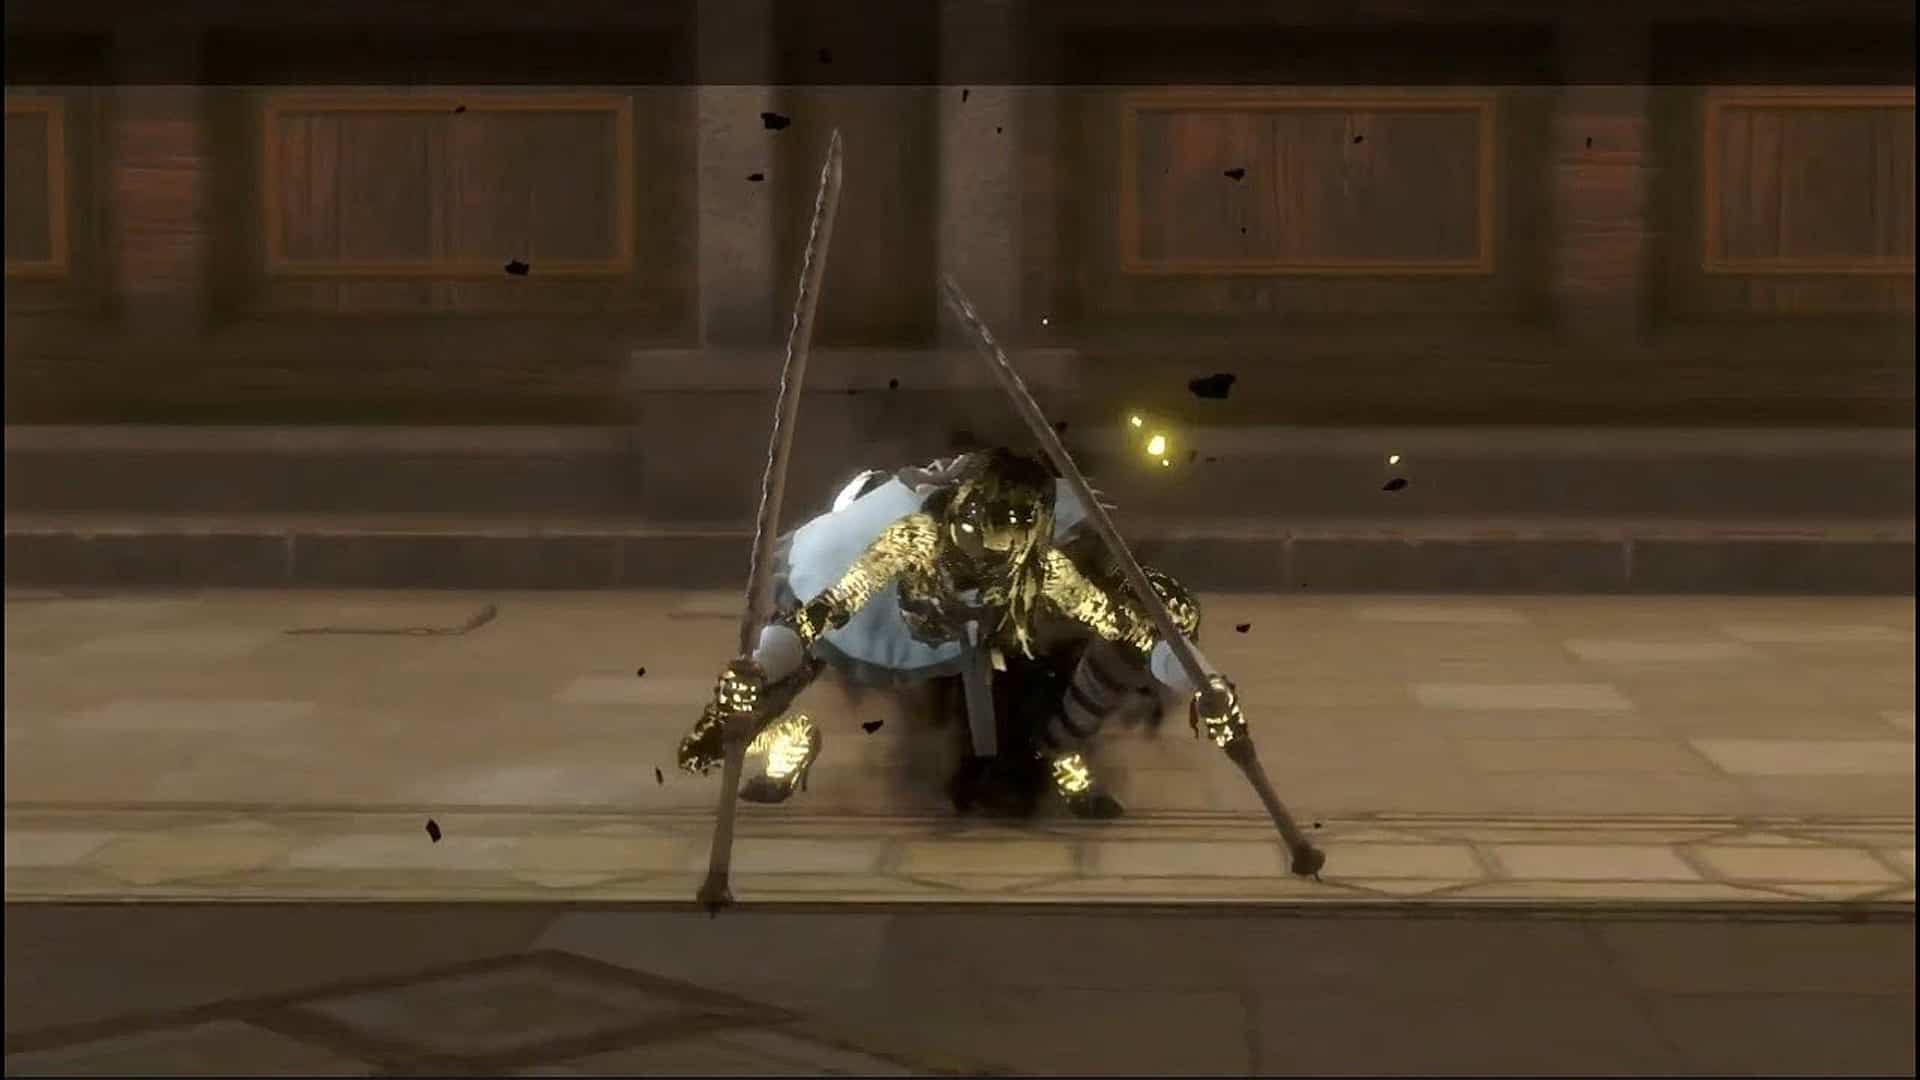
Soul Crusher
You will encounter this trophy while working on Endings C or D; however, you must wait until after completing Ending E as you’ll receive a better weapon. The next time you see Devola and Popola, they won’t hold back, so you’ll have to beat them.
There are two parts to this fight with a somewhat lengthy cutscene in between, so make sure to skip it (and any other cutscenes) when it starts playing. Otherwise, you’ll go over the three-1/2-minute limit.
You’ll be fighting both sisters simultaneously for the first part of this fight. One will stay on a ledge to the side (Popola), while the other will come down and fight in the central area with you (Devola).
Like before, ensure you’re locked onto Devola and repeat the process from Popola’s battle. When she teleports, try not to get too close, or her pink shield will knock you back — and do your best to avoid her attacks altogether.
If possible, use a fully-charged Dark Lance or Dark Hand attack/s — these tend to deal decent damage against her. After feeling Devola, Popola will engage you in combat. She’ll attack with a series of orbs which you can avoid by jumping or attacking through them.
A charged Dark Lance works well here (be sure to hop over her balls for a clear shot). Feel free to use a Magic Potion if the orb barrage becomes too much. You will end the fight by defeating Popola. Be sure to skip all cutscenes, and if you beat the ladies within the required time, you’ll unlock the trophy.
Book Burner
The average reader can finish this book in less than two minutes, as it is one of the weaker ones. You can get through it without too much trouble and still go for Ending A or B. The Shadowlord will be your next big fight after Grimoire Noir.
It has a few attacks, but they’re nothing you can’t handle with Dark Lance and Dark Blast.” GN will spawn dark pages around itself that act as a shield. If you don’t destroy the enemies quickly enough, they’ll fly out into the room and shoot orbs at you.
Attack them as much as possible until they surround themselves with a yellow sphere and zoom across the room. Chase after it, and when it stops, attack the yellow orb to break it so you can continue hitting the enemy.
If you follow these steps, defeat him within the time limit, and skip any cutscenes, the trophy will unlock quickly.
The Once and Final King
Though you can technically complete this trophy at any time, it’s recommended that you wait until Endings C or D or after completing Ending E. You’ll get a much more powerful weapon as a reward for completing those runs.
The final boss of the game, Shadowlord, will appear after you defeat Grimoire Noir. He uses weapons and magic against you and is constantly moving around, but if you can attack him when he’s on the ground, you’ll be able to cause severe damage.
He’ll still try to fire some magic attacks at you, so be sure to evade by dashing toward the other side of him. This will allow you to avoid his Attacks and Rush him with your counterattacks until he’s down again.
If he moves around again, use your magic attacks from a distance until he’s back in place. He’ll eventually fly into the air and stay there, so your magic attacks will be most helpful here. A charged Dark Lance comes in very useful in this situation.
Dodge his magic attacks (you’ll know they’re coming because you’ll see red columns appearing directly in front of him). This section might take longer than usual, but don’t worry too much – the last part is quick and easy.
He’ll cruelly strip away your ability to use magic when you get his HP down to almost empty. All that will be left at your disposal are weapon attacks. You’ll start on opposite sides of the room. He won’t move from his spot, though he will attack you with orbs.
Run or roll quickly to him while avoiding his orb attacks and hitting him. You’ll fly back to the other side of the room after making contact, so repeat this process twice; hitting him three times in total will defeat him.
A few scenes during this fight will need to be skipped to save time, so make sure you do that. The trophy will unlock if you defeat him within the given time limit.
The Strongest Bond
You will only encounter this battle during Ending C and Ending D. To start the fight, Kainé will be in the room with an orb on her left and one on her right tethered to her. These orbs release an array of other balls in various directions.
Attacking does nothing to these spheres or Kainé, so you need to dodge them as they come at you. For the second part, it’s highly recommended you pop a strength potion. You won’t have magic abilities, so it’ll just be you and your weapon.
Kainé will go through various attacks, mostly alternating between trying to punch you in the face and drowning you in orbs. Evade her attacks as best possible and attack her at any openings you see; even if they’re small windows, take them!
It might take some time to get her down, but as long as she stays on top with consistent attacking, this shouldn’t be an issue. If, for whatever reason, this is too difficult on Ending C mode, try again on Ending D mode – you should have more luck that way since enemies are weaker overall.
A few cutscenes are skippable if you don’t want your clock to run down, so bear that in mind. The trophy will unlock after defeating her (and as long as it’s within the required time limit).
Secret trophies
In addition to the main ones, the game has many secret achievements. Let’s discover each of them.
The Book of Legend, The Wild Companion, and The Mellow Companion
During Part One, Grimoire Weiss, Kainé and Emil will automatically join your party, and achievements will be unlocked. You can’t miss this because it’s story-related content.
Release
You will earn this trophy when you successfully break the spell that has petrified Kainé. You will have the opportunity to do this at the start of Part Two.
Gratitude
Starting from Ending C, the story with Louise will change. After alternately defeating her, Kainé will return to the beach and give a letter back to the postman. This choice will appear on Endings C and D, but you’ll only get the trophy if you do it on Ending C.
Key Collector
You will need the Key to complete the game. Part Two’s main story quest chain finishes with this, so you’ll get all the required pieces for progressing the story by following the red “X” on your mini-map.
A World in Flux
To get all endings in the game, you’ll need to defeat the Shadowlord. You can find tips on how to do that in The Once and Final King.
Dear Diary
There are three Recycled World quests that you can only start after finishing the game once. These quests automatically begin, and the only way to exit is through the door where it all started. Each search takes around 15-20 minutes to complete.
So, you plan on spending about an hour on these side quests. You can find the uncompleted chores in your house via your Mom’s Diary. The first shelf you come to will have a marker over it when you enter the house.
This diary is your Key to getting back into the Recycled World. If you don’t complete a quest or gauntlet, you must start from the beginning, so be sure to use your potions wisely. Once you finish the third and final task, the trophy will unlock.
Call Her Back
To earn Ending A, beat the game once. After watching the unskippable credits roll, save your progress when prompted, return to the main menu, select Continue, and load saved files. You’ll start at the beginning of Part Two again but can now proceed to finish the second half and unlock Ending B.
Lingering Memories

Ending B will happen when you finish the game a second time and choose to “continue” from your Ending A save file. You’ll only need to do the second half of the game again, so if you want to skip everything you’ve already seen when doing Ending A, this step should take 1-3 hours.
Be sure to save your game when prompted after the non-skippable credits finish. At the main menu, hit “continue” and reload your save file; you’ll start at the beginning of Part Two and can work on getting Ending C.
Thank You
Before attempting to finish the game and access Endings C or D, you must gather all weapons. However, ending B will play again if you don’t have every gun when trying to complete the game. One specific weapon is available after passing the point of no return in Shadowlord’s castle (the Phoenix Sword).
Although this may be the last weapon needed for these endings, it’s okay if it isn’t collected until after entering Shadowlord’s Castle. So long as all other weapons are obtained before entering the final room to fight.
Upon defeating Shadowlord, you will have one more battle. The individual you choose to sacrifice at the end of this fight will decide which alternate ending you receive. If you want to experience Ending C, select Option A when choosing between sacrificing another or yourself.
After the credits finish rolling (which cannot be skipped), save your game when prompted. From the main menu, select “continue” and load up your newly saved file. Part Two will begin, and you can journey towards Ending D.
Something Very Special
Only complete Ending D after you finish the Speedrun for Lightspeed Fighter if you want to preserve all your saved files. Once you finish that ending, it will erase ALL of your saves- including the main one.
You have to do end E to return your primary file, but any others are permanently deleted. After you’ve collected all the weapons for Ending C, you don’t have to worry about gathering anything else.
If you haven’t already gotten the time-related “boss” trophies, earn them during this run or wait until after you finish Ending E – you’ll get a much more powerful weapon that will make taking them down go quickly.
Progress through the game and defeat Shadowlord like before; however, remember that one extra enemy is waiting after him. After you defeat her, you’ll have the option to A) Sacrifice another character or B) Sacrifice yourself. For Ending D, choose option B.
Your save files will be deleted, and your game progress will reset (but don’t worry, you can get it back). After the credits roll, you’ll find yourself on the main menu. Choose to start a new game and create a new character.
You can’t use the same name as before, so choose something different. This will let you access Ending E.
e8a898e686b6e382b5e383bce38390e383bc
You need to obtain Daredevil before you trigger Ending E. If you still need to get it by the time you finish your first playthrough, restart from the beginning and play through until you get it. Ending D requires you to start the next game with a new character, and your old player’s name will be locked.
You don’t need to finish the game for this ending; reach the halfway point and take down the mini-boss in the Aerie. Kainé will then give her “just let me die here” speech. When you run up to her this time and help, you’ll start a new gameplay sequence where you take control as Kainé.
Work your way through the events of her story until you reach the end. You’ll be asked if there’s someone special that you want to save at that point and pick “yes” to unlock Ending E. After the credits roll, the game will ask for the name of “the person you cherish.”
Write it before your saved files are wiped. This will restore your save file and when you hit continue at the main menu, you’ll start Part Two again and work towards Ending D. If you had any uncompleted side quests in your Grimoire before your save file was wiped, you’d need to start them over again.
You’ll also be given an additional pursuit related to the story to get a new, much better weapon. Follow the red “X” on your mini-map and find the gun waiting for you there.
Legendary Gardener
The most time-consuming trophy in this game will take, at minimum, 168 hours to earn if done legitimately. The original method is listed below; however, you can’t manipulate the clock as you could in the PS3 version.
To get the Legendary Flower, you’ll need three complete growing cycles and one partial cycle. To get the White Moonflower, you’ll need to spend a lot of time cross-breeding other colored Moonflowers until you get to White.
The flowers’ growth stages are as follows:
- 24 hours to grow/harvest as a flower;
- twenty-four hours to grow/harvest as seeds.
The first three Moonflowers you’ll cross-breed or create will need seeds. The Peach Moonflower, for instance, is made by cross-breeding Red and Gold Moonflowers, Indigo Moonflower – Blue and Gold Moonflowers.
Lastly, create the Pink Moonflower – made from red and indigo (though it may not seem logical) – cross-breed Red and Indigo flowers. To cross-breed your Pink and Peach Moonflowers, you’ll need to have their horizontal positions alternating. Having more seeds also increases the chance of this being done on time.
If you’ve fully expanded your garden, each row will have five spots to plant. You can buy Speed Fertilizer from the vendor in Seafront, which reduces the growing time for flowering by half. However, it won’t affect the seeding part.
Growing Peach Moonflowers:
| Red | Gold | Red | Gold | Red |
| Gold | Red | Gold | Red | Gold |
| Red | Gold | Red | Gold | Red |
Growing Indigo Moonflowers:
| Blue | Gold | Blue | Gold | Blue |
| Gold | Blue | Gold | Blue | Gold |
| Blue | Gold | Blue | Gold | Blue |
Growing Pink Moonflowers:
| Red | Indigo | Red | Indigo | Red |
| Indigo | Red | Indigo | Red | Indigo |
| Red | Indigo | Red | Indigo | Red |
Growing a White Moonflower (A Lunar Tear):
| Peach | Pink | Peach | Pink | Peach |
| Pink | Peach | Pink | Peach | Pink |
| Peach | Pink | Peach | Pink | Peach |
With luck and some help from fertilizer, you should have one White Moonflower ready for harvesting after 12 uses. Unlike most other plants, you don’t have to wait for the seeds to mature – the flower itself is sufficient. After successfully picking it, the trophy will unlock.
Fish of Legend & A Round by the Pond
To get the Fisherman’s Gambit trophy, you’ll need to catch a total of 15 fish. 9 of these are required for the side quest by the same name, and one is needed for a story-related search. You will be able to complete the last four inquiries related to Fisherman’s Gambit after progressing in Part Two of the story.
| Quest | Available | Requirements |
|---|---|---|
| The Fisherman’s Gambit | Part I & Part II | Catch 10 Sardines |
| The Fisherman’s Gambit Part 2 | Part I & Part II | Catch 7 Blowfish |
| The Fisherman’s Gambit Part 3 | Part I & Part II | Catch 7 Rainbow Trout |
| The Fisherman’s Gambit Part 4 | Part I & Part II | Catch 5 Bream |
| The Fisherman’s Gambit Part 5 | Part I & Part II | Catch 5 Black Bass |
| The Fisherman’s Gambit Part 6 | Part II | Catch 3 Sandfish |
| The Fisherman’s Gambit Part 7 | Part II | Catch 3 Royal Fish |
| The Fisherman’s Gambit Part 8 | Part II | Catch 2 Blue Marlin |
| The Fisherman’s Final Gambit | Part II | Catch 1 Hyneria |
You’ll mostly find these fish on Seafront, but some will occasionally require travel to North Plain, Eastern Road, and even Desert. There are 3 “rare” fish involved, which may give you more trouble than usual, but nothing that should take a little time.
The Seafront tackle shop sells all of the necessary baits, and the Sardine and Carp become available for purchase from the fish vendor after you catch each species once.

Seafront Fish:
| Fish | Bait | Sell Value | Special Notes |
|---|---|---|---|
| Shaman Fish | Lure | 60 gold | |
| Sardine | Lugworm | 125 gold | |
| Blowfish | Lugworm | 125 gold | |
| Bream | Lure | 750 gold | |
| Shark | Sardine | 1,250 gold | |
| Blue Marlin | Sardine | 1,900 gold | Blue Marlin isn’t hooked when the lure is pulled underwater but rather on the first bob. If the first controller vibration is strong, you’ll know one’s been caught. |
| Dunkleosteus | Sardine | 12,500 gold |
Your Village Fish:
| Fish | Bait | Sell Value |
|---|---|---|
| Carp | Earthworm | 100 gold |
| Black Bass | Lure | 1,500 gold |
Northern Plains Fish:
| Fish | Bait | Sell Value |
|---|---|---|
| Rainbow Trout | Lure or Earthworms | 600 gold |
Eastern Road Fish:
| Fish | Bait | Sell Value | Special Notes |
|---|---|---|---|
| Giant Catfish | Carp | 2,250 gold | Unlike most fish, giant catfish are not hooked when the lure is pulled under the water. Instead, they are caught on the first bob. Consequently, if you feel a strong vibration from your controller, you have successfully gotten one. |
| Royal Fish | Earthworm | 4,000 gold |
Desert Fish:
| Fish | Bait | Sell Value | Special Notes |
|---|---|---|---|
| Sandfish | Lure | 2,500 gold | The sandfish won’t be hooked when you pull it under the sand. Instead, they’ll be caught on the first bob. If you get a strong vibration from your controller, that’s how you’ll know one has been hooked. |
| Hyneria | Sardine | 6,000 gold | |
| Rhizodont | Sardine | 15,000 gold |
The trophy for catching all 15 fish will unlock once you’ve seen them. Fishing can be a great alternative to other options if you need to earn some quick gold. There’s also a chance you’ll return to this as you’re working towards the Man of Means trophy.
Material Hunter
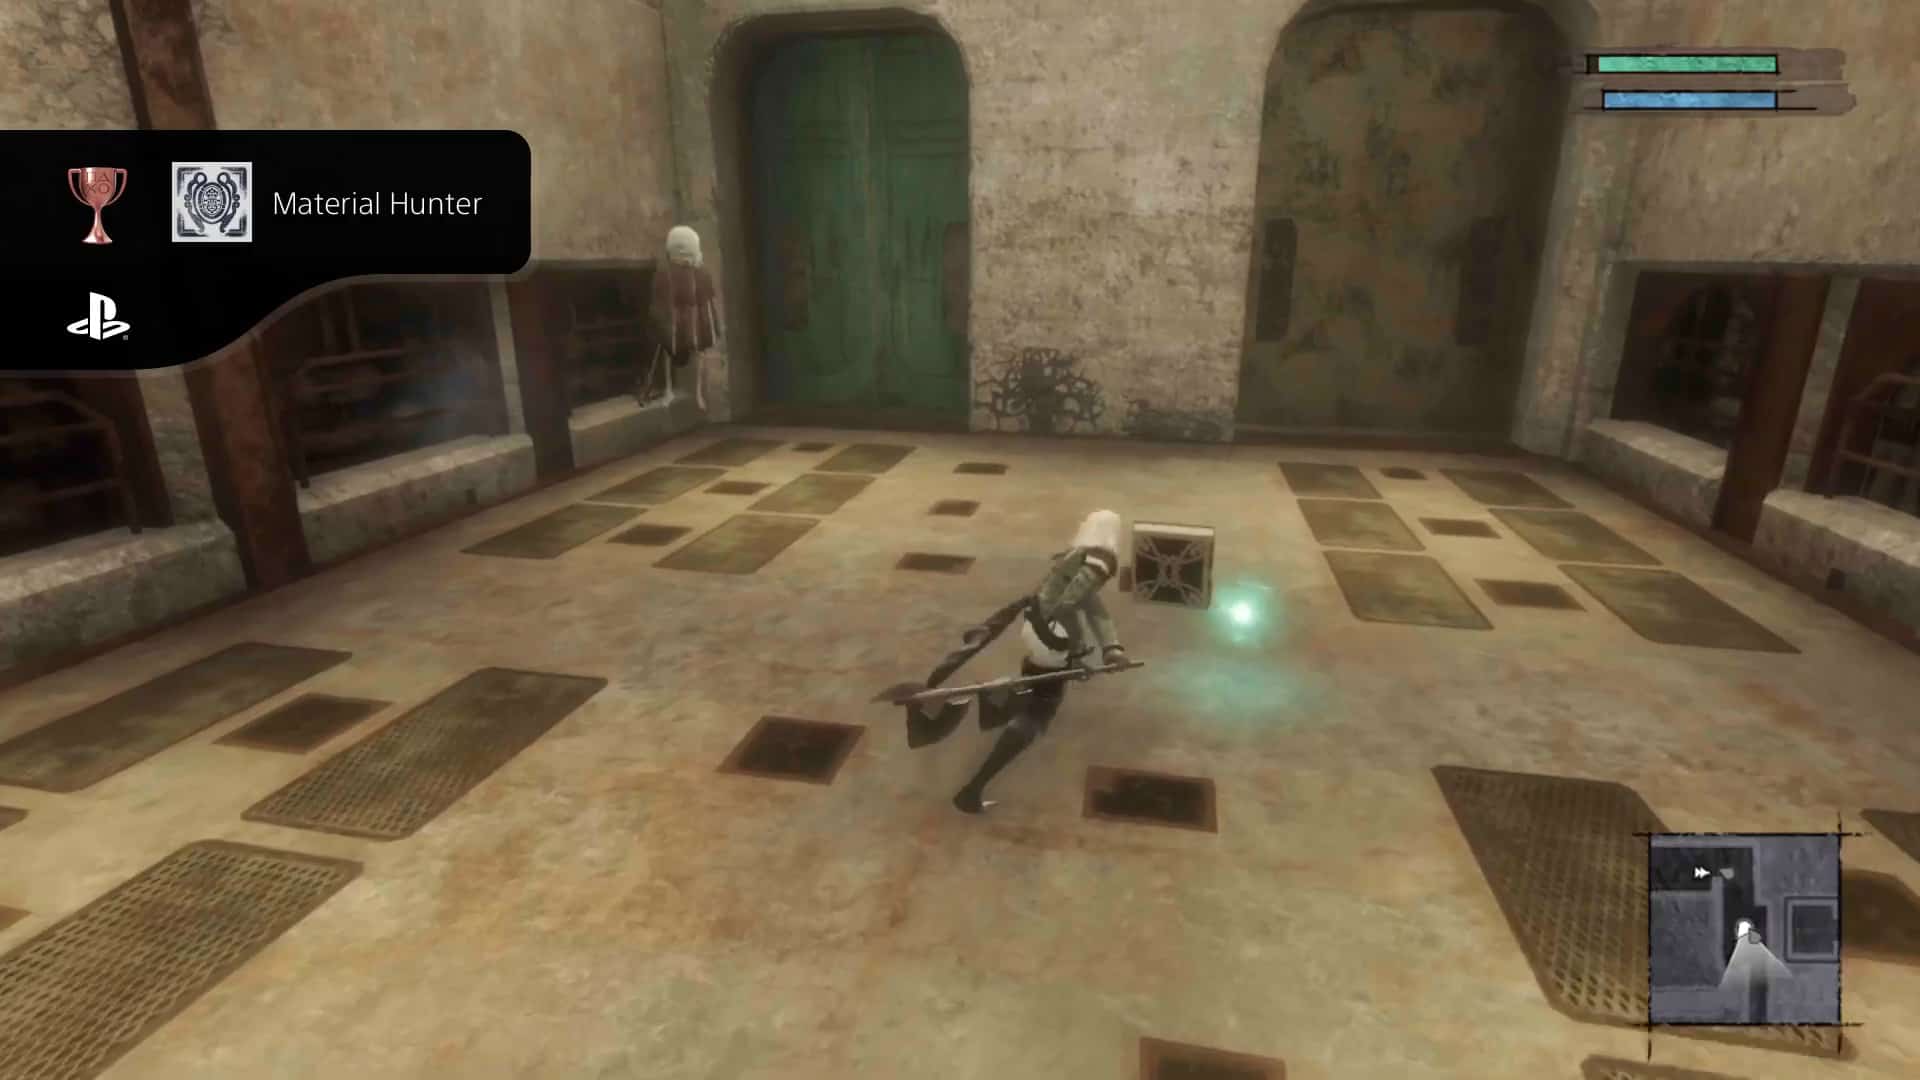
You’ll unlock this as you play the game if you pick up every item you see. All “raw materials” count towards the total, including trash and things used for crafting. The only thing that doesn’t are fish. You need to collect 50 different materials, but they can be with you simultaneously (thank goodness).
You will come across 44 unique materials by simply exploring for weapon upgrades. Materials not found can easily be paned for out in the open world or dropped from enemies. You can keep track of your progress by going to the “Item” tab in the Grimoire and selecting “Raw Materials.”
Upgrade Apprentice, Reform Specialist, and Forging Master
The only items remaining on the list are a few necessary to improve the quality of the “Fool’s” weapons rewarded from the completion of Recycled World Quests. To upgrade all 3 Weapons, you’ll need Damascus Steel, located on floor B2 in Junk Heap.
There is a room at the very top of the first corridor with large crates. You will likely find Amber while going through this area, but you may also get lucky and find Fluorite or Damascus Steel. You will need a total of 9 pieces.
If you want to farm for grinding mats, clear the room, leave, and come back later. The boxes will have respawned by that time, giving you more opportunities to gather the necessary materials.
The only items remaining on the list are a few necessary to improve the quality of the “Fool’s” weapons rewarded from the completion of Recycled World Quests. To upgrade all 3 Weapons, you’ll need Damascus Steel, located on floor B2 in Junk Heap.
There is a room at the very top of the first corridor with large crates. You will likely find Amber while going through this area, but you may also get lucky and find Fluorite or Damascus Steel. You will need a total of 9 pieces.
If you want to farm for grinding mats, clear the room entirely, leave, and come back later. The boxes will have respawned by that time, giving you more opportunities to gather the necessary materials.
Below is a complete list of the materials you will need to upgrade every weapon:
| Item | Needed | Where to Find |
|---|---|---|
| Amber | 6 | Junk Heap boxes, Recycled Vessel boxes, Facade material shop for 6,000 gold |
| Broken Antenna | 37 | Drop from grounded bots in the Junk Heap |
| Black Pearl | 15 | Gather spots on the Seafront beach |
| Broken Battery | 5 | Standard drop from flying robots in the Junk Heap |
| Broken Arm | 49 | Typical drop from grounded robots in the Junk Heap |
| Broken Lens | 5 | Drop from grounded robots in the Junk Heap, Two Brothers Weaponry shop for 900 gold |
| Broken Earring | 4 | Rare drop from Shaman shades (human-sized shades that shoot orbs) |
| Broken Pottery | 2 | Rare pickup from gathering points in the Northern Plains and The Aerie |
| Broken Motor | 11 | Standard drop from flying robots in the Junk Heap |
| Broken Wristwatch | 11 | Rare drop from large armored shades in the Southern Plains |
| Broken Saw | 5 | Rare drop from small armored shades in the Northern Plains |
| Complex Machine | 8 | Random drop from giant mini-boss shades |
| Clay | 18 | Typical pickup from gathering points, Facade material shop for 800 gold |
| Crystal | 8 | Recycled Vessel boxes, Facade material shop for 2,400 gold |
| Copper Ore | 88 | Standard pickup from gathering points, Two Brothers Weaponry for 480 gold |
| Dented Metal Bat | 21 | Rare drops from small shades in the Northern Plains or Research Lab in the Manor |
| Damascus Steel | 9 | Recycled Vessel boxes, Junk Heap boxes |
| Elaborate Machine | 5 | Random drop from giant mini-boss shades |
| Eagle Egg | 4 | Recycled Vessel boxes, rare pickup from gathering points in The Aerie |
| Forlorn Necklace | 4 | Rare drop from Shaman shades (human-sized shades that shoot orbs) |
| Fluorite | 18 | Recycled Vessel boxes, Junk Heap boxes, gather points in the Barren Temple |
| Gold Ore | 22 | Recycled Vessel boxes, rare pickup from gathering points in the Desert, Barren Temple, and The Aerie |
| Giant Egg | 6 | Rare pickup from gathering points around your village |
| Large Gear | 6 | Rare drop from grounded robots in the Junk Heap |
| Iron Ore | 259 | Random pickup from gathering points, Two Brothers Weaponry for 1,000 gold |
| Memory Alloy | 8 | Rare drop from the giant mini-boss robots in the Junk Heap |
| Machine Oil | 5 | Rare drop from flying robots in the Junk Heap |
| Meteorite | 5 | Recycled Vessel boxes, rare pickup from gathering points in the Desert or Barren Temple |
| Metal Piercing | 4 | Rare drop from flying shades in the Desert (only appear after obtaining key fragment in Facade) |
| Mysterious Switch | 9 | Rare drop from grounded robots in the Junk Heap |
| Moldavite | 8 | Rare pickup from gathering points in the Desert or Barren Temple, Seafront material shop for 8,000 gold |
| Pearl | 1 | Gather spots on the Seafront beach, Seafront material shop for 3,000 gold |
| Natural Rubber | 1 | Rare pickup from gathering points, Seafront material shop for 700 gold |
| Rusted Clump | 10 | Recycled Vessel boxes caught while fishing |
| Pyrite | 14 | Recycled Vessel boxes, rare pickup from gathering points in the Desert and Barren Temple |
| Rusty Kitchen Knife | 9 | Rare drop from small shades in the Northern Plains dropped from enemies in your dream |
| Rusty Bucket | 10 | Caught while fishing |
| Silver Ore | 121 | Rare pickup from gathering points, Two Brothers Weaponry for 1,500 gold |
| Scorpion Claw | 10 | Standard pickup from scorpions in the Desert |
| Stopped Clock | 3 | Rare drop from the sword-wielding shades in the Research Lab under the Manor |
| Simple Machine | 6 | Random drop from giant mini-boss shades |
| Subdued Bracelet | 3 | Rare drop from flying shades in the Desert (only appear after obtaining key fragment in Facade) |
| Stripped Bolt | 10 | Typical drop from grounded robots in the Junk Heap, Two Brothers Weaponry for 900 gold |
| Twisted Ring | 5 | Rare drop from armored shades in the Lost Shrine |
| Titanium Alloy | 24 | Recycled Vessel boxes, the rarest drop from grounded robots in the Junk Heap, a standard drop from giant mini-boss robots in the Junk Heap |
All Aboared!
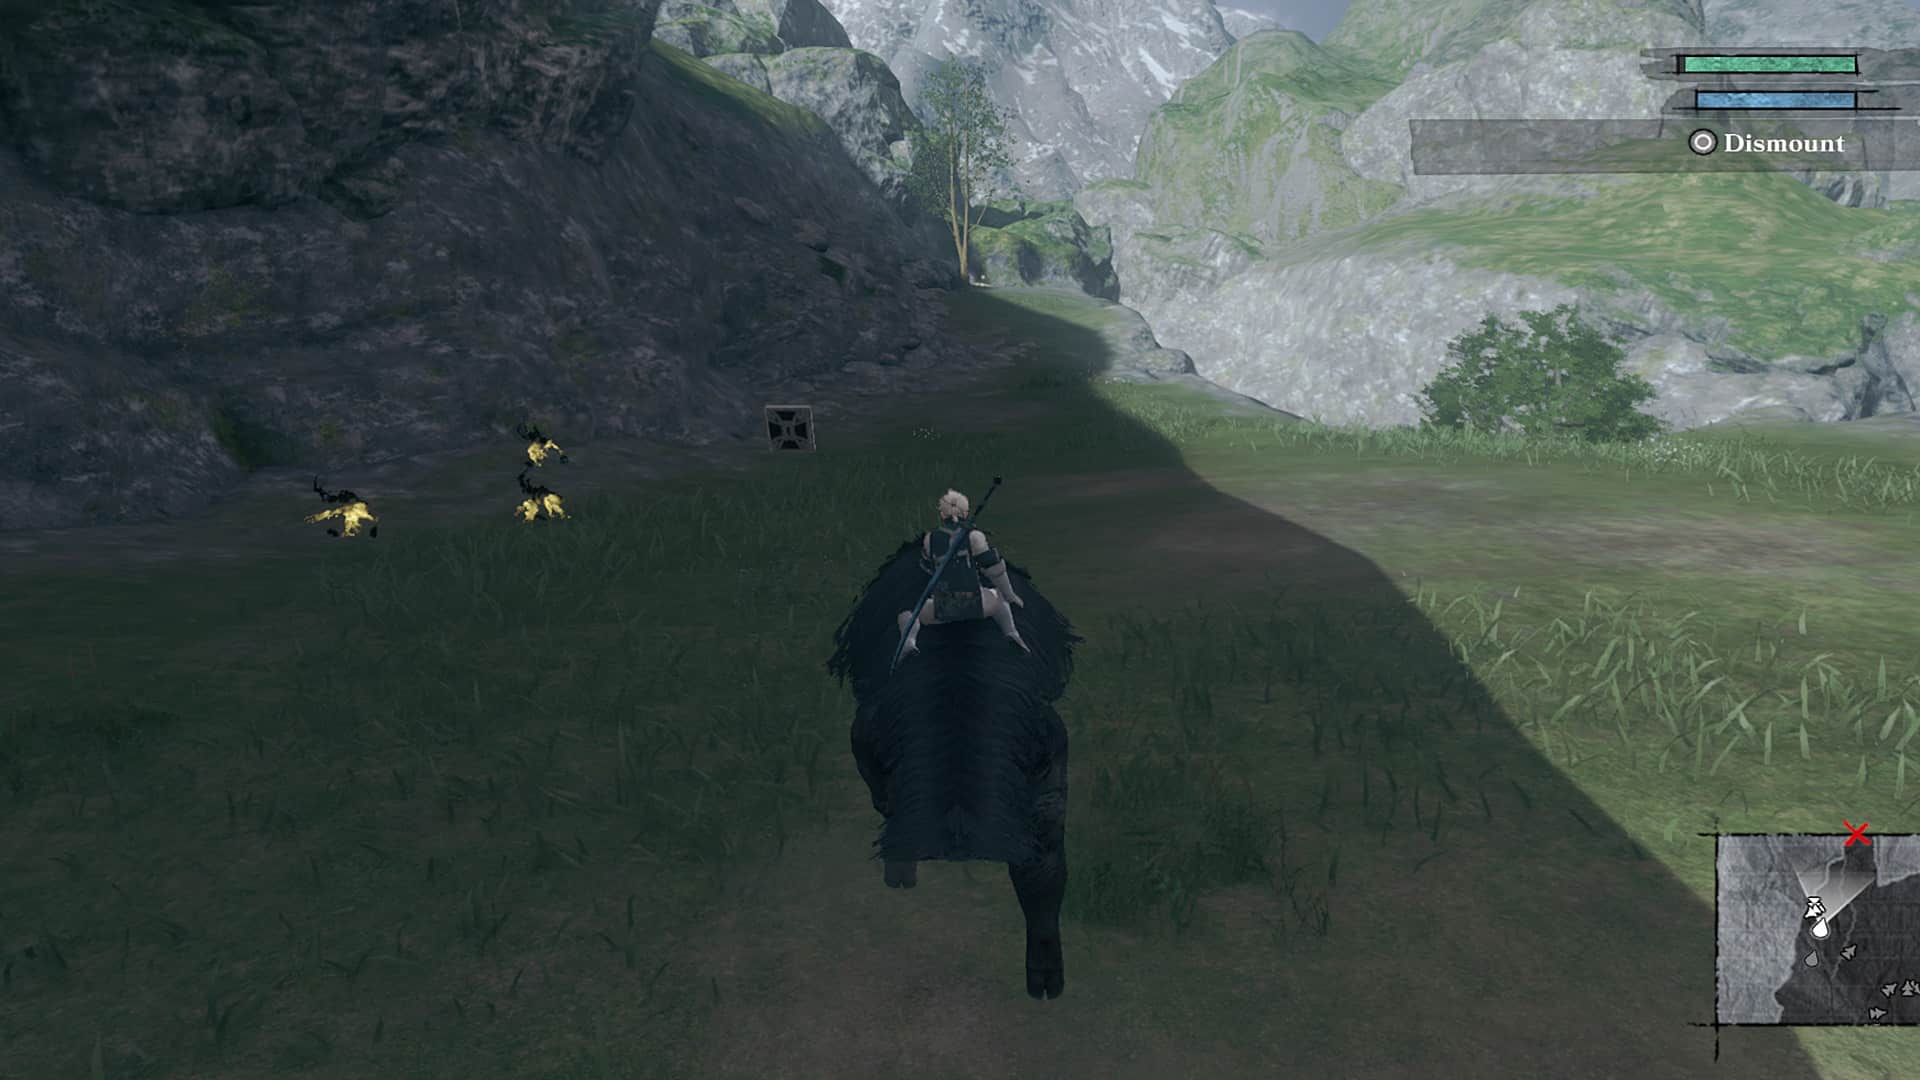
Before you can earn this trophy, you must first finish the Side Quest “Boar Hunt.” A quest giver is an older man, and he’s located in the village. He’ll be sitting on a crate to your left as soon as you enter the town from the Church side.
After completing the quest, you’ll unlock riding Boars which will make traveling faster (that is, until you get your fast travel boat). The Boar can be found in both the Southern and Northern Plains, near the entrances/exits to other locations.
You can either idle for 5 minutes or explore while riding around on the Boar. If you hang around, avoid using your dash, so you don’t accidentally crash into a wall and fly off the Boar. And stay hidden from any Shades that might be roaming about if you decide to idle – otherwise, they’ll knock you off!
Remember that all 5 minutes must be done in one sitting so that the achievement will unlock.
The Sheep Whisperer
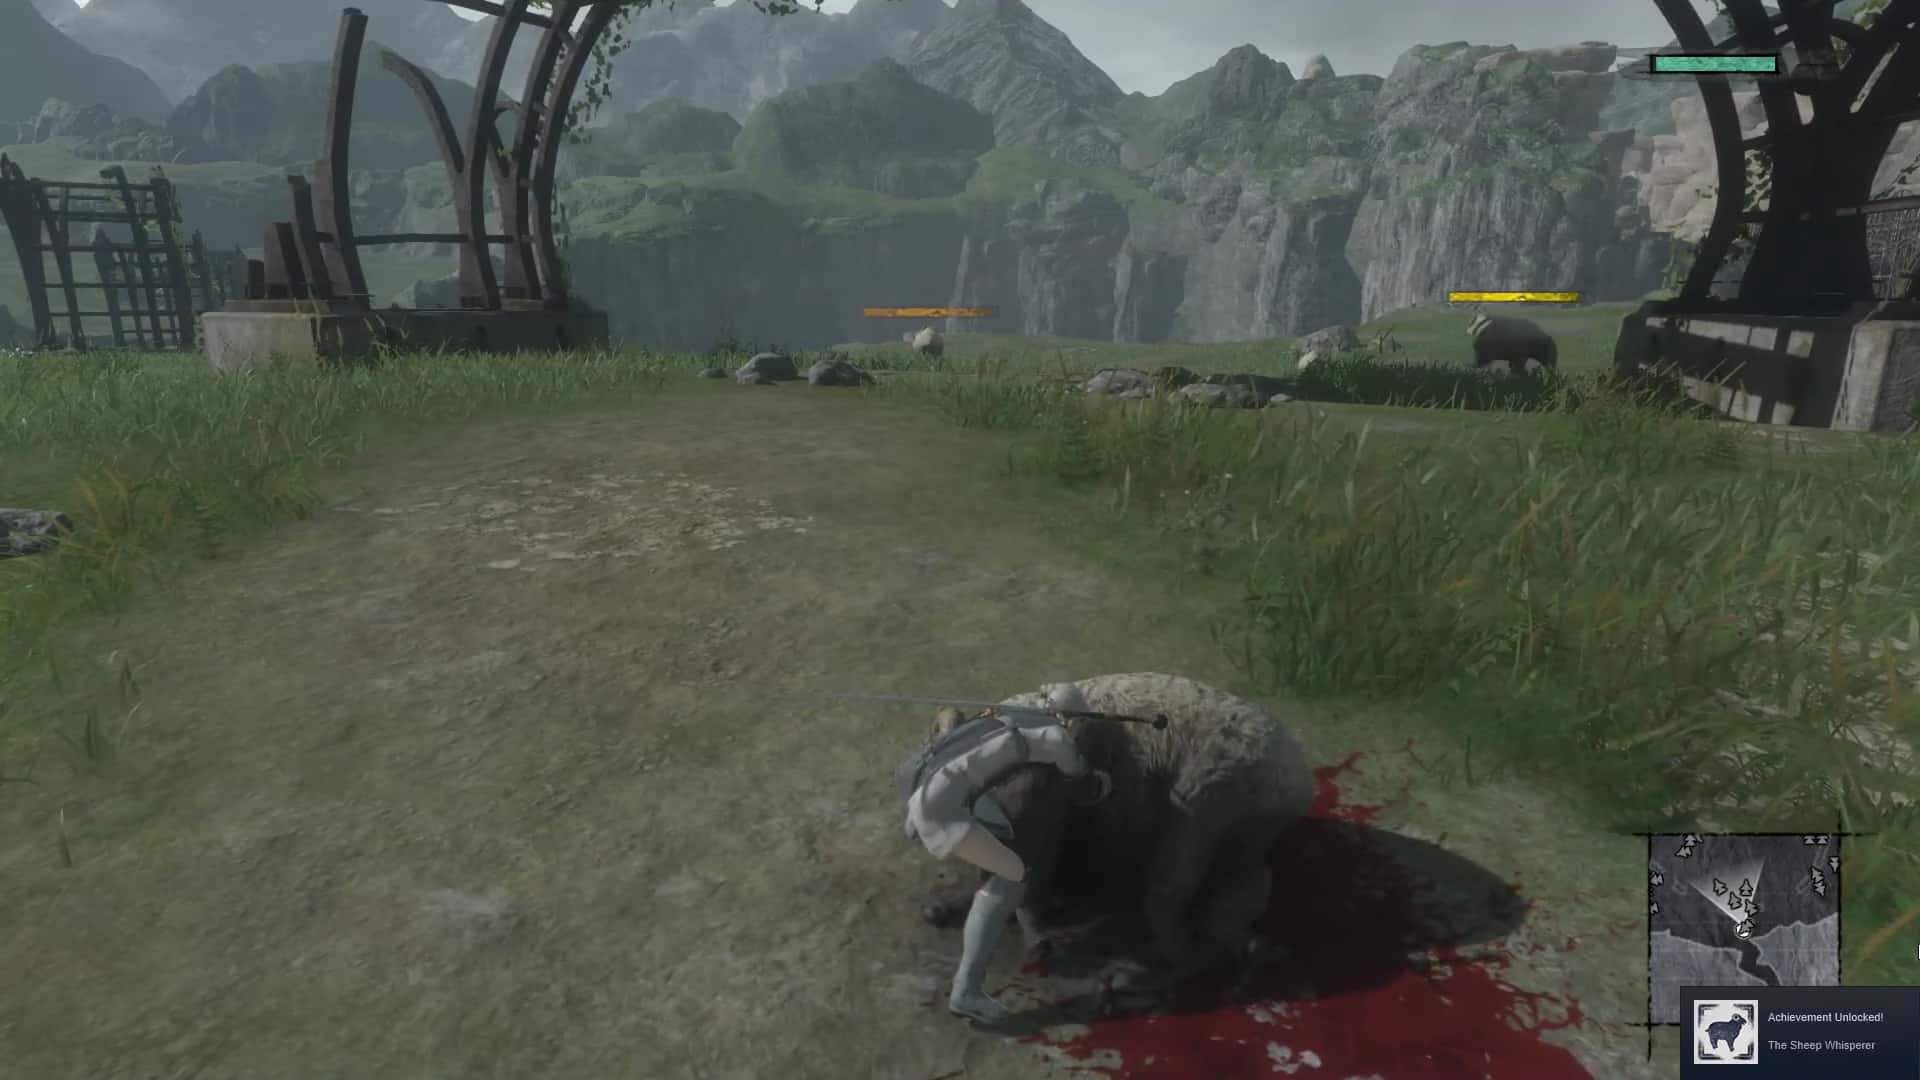
You’ll find the sheep in the Northern Plains, and there are more of them in Part One. However, this number decreases because Shades gradually kill some sheep as you play each part. It’s best to complete this trophy early, so it’s out of the way.
When you start playing, it will take two or three hits to down a Sheep, but before long, they’ll go down with one strike from your sword. And if you’re thinking about attacking them with your blade while sneaking up behind them: don’t bother.
If they catch sight of you and you’re too close for comfort, they’ll kick back and hit, likely leading to frustration – and their demise at your hands soon after that. The sheep in the Northern Plains will respawn every time you leave and re-enter the area, so be sure to kill them each time you pass by.
You’ll need to go through the Northern Plains quite a few times during the story progression, but as long as you remember to kill the sheep each time, it’s no trouble.
Lightspeed Fighter
If you complete the walkthrough as specified in the Roadmap, it will be much less daunting than anticipated. Also, this task will be more straightforward if you’ve already played the original NieR game. If playing for the first time, however, do not try and accomplish this on your initial run.
To earn this, you must complete the game within 15 hours. Cutscenes and idling on the save screen count towards this time limit, so it is best only to do story-related quests marked by the red “X” on the mini-map. This way, you can quickly finish Part One in 8 hours or less and Part Two in 10 hours or less.
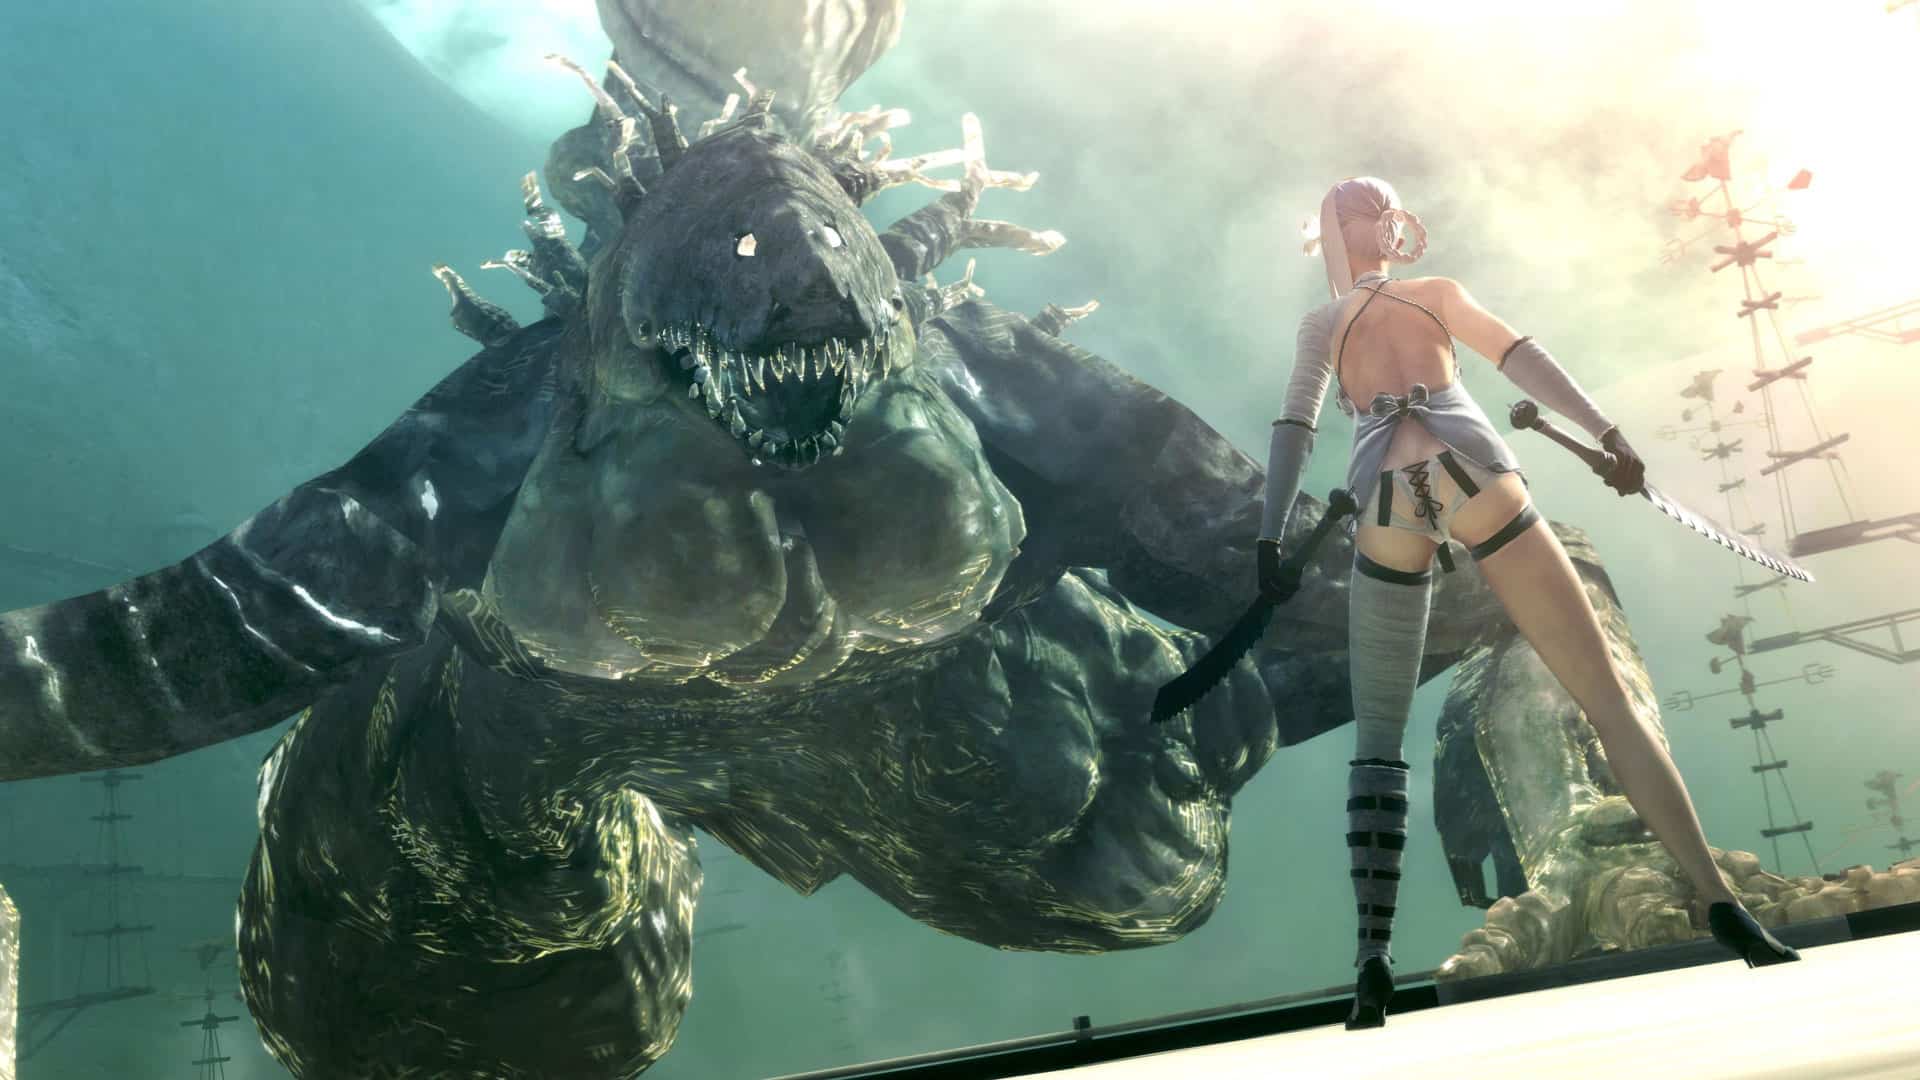
The Little Mermaid
You’ll only be able to attempt this fight once you’ve completed Ending C. You’ll get another chance during Ending D and then again after you finish Ending E. It’s a good idea to create a save before starting any new section you need to restart.
The timed portion of the fight will begin once you’re on the ship’s deck (after you’ve made your way through the tentacles in the corridor inside the boat). If you want to have a higher chance of winning, it’s advised that you use your Strength and Magic potions during the battle.
Unlike what occurred in Endings A and B, this will be different, so steel yourself. The beginning moves slowly, and she won’t take much damage then.
It would help if you aimed for either of her two “hands,” but until she goes through one “whirlwind” attack – where the blows come from one side of the ship – you likely won’t see a change in HP. That’s when Kainé & Weiss will tell you to focus on her hands.
Next, you’ll see her HP depleting; feel free to use any potions. You can alternate between attacking her from the front or back, depending on where her whirlwind attack is coming from. After taking down one hand, tentacles will appear on the ship’s deck–this part takes up the most time.
Use your Dark Lance, Dark Hand, and heavy weapon attaches to burn each tentacle down quickly. Once they’re gone, the second stage of fighting will commence. Wendy will now be large and charging toward you, trying to hit you with her fists.
You can’t use magic attacks/spells on these creatures, so drink a strength potion and get ready to strike them when they come down. Both fists will share HP, so you can alternate between hitting them.
If Wendy starts shooting orbs at you, you probably won’t be able to defeat the creature within the required time frame, so reload your saved file if necessary. Next, you’ll want to use your magic attacks on her head, making her go back into the water.
You need to be careful as you run/roll up her tentacles because if you fall off, it takes a long time to “respawn.” If this happens, it’s best to reload your save. Once you’re at the top, throw everything you can at Wendy.
Use your weapon and Dark Blast to get through the orb attacks coming toward you. Bypass all cutscenes that initiate during the battle, and after you emerge victorious (provided it’s within the timeframe limit), the trophy will be yours.
Daredevil

The ‘scandalous’ trophy/achievement causing quite a stir among pre-release NieR Replicant news readers can only be earned by Kainé. It must be completed before finishing Ending E.
If you reach the final decision and have not achieved it yet, select “No” when the game asks if you want to retrieve the person you love, and you’ll reload at your most recent save on that file. This might necessitate quite a bit of backtracking, but it’s better than finishing Ending D again to get back here.
The less-than-savory details: as you’re playing Kainé, you’ll need to rotate the camera, so it’s looking up her nightie at her undergarments. And yes, I know this is a pervy move. If done correctly, Kainé will give you a sassy remark and kick the camera (and, by extension, you) in the face before walking away.
You must do this ten times before she finally gets fed up with your behavior and kills you. The trophy will unlock upon receiving the game over/continue screen.
The camera angle will be your main issue when getting this trophy, as the “off-the-shoulder” camera positioning and mini-map make it challenging to see what you need. You’ll need to place Kainé on a high spot and look at her from below for the best chance at getting it.
This will enable you to reach her privates ten times, thus acquiring the trophy.
Conclusion
The game can be a bit daunting at first, but it can be efficiently completed with the proper knowledge. Most of the trophies quickly come from just running the story multiple times. If you are looking for platinum, this NieR Replicant trophy guide is for you.
It includes information on how to complete the game and earn all 47 achievements and will help to carefully plan and execute your playthroughs to get The Final Verse as quickly as possible. So good luck and have fun!

Peter Lyakh
I write reviews, guides, tips and interesting facts about a wide variety of RPGs on the market. In addition, I offer my vision of the best characters, progression, and ways to play that can help beginners improve their skills and gaming experience.
More articles:
Project Zomboid infection detailed guide
Do you want to learn more about infections in Project Zomboid? This game includes a … Read more

Best Mona build — Genshin Impact
Updated in January 2023 Mona Rating: Rarity: ★★★★★ Element: Hydro Weapon: Catalyst EN Voice Actor: … Read more
“Erudition guide thee”: how to get the Erudition Gesture in Elden Ring
Updated in January 2023 The Erudition gesture is unique because it can be used for … Read more
Lost Ark Rapport guide
Updated in January 2023 In most modern video games, there are usually characters that you … Read more

Best non-degradable armor – Runescape
Updated in January 2023 There are plenty of options regarding weapons and armor in the … Read more
OSRS mining guide
Updated in January 2023 Mining is one of the most straightforward skills in Old School … Read more
Lineage 2: Revolution class guide
Updated in January 2023 The mobile version of NCSoft’s Lineage 2 Revolution is a that … Read more
OSRS Woodcutting guide
Updated in January 2023 Most MMOs take you into a campaign that features the most … Read more

Best Gaming Recliner
Updated in January 2023 The best Gaming Recliners are a popular piece of interior design … Read more